
 Get Palette Grid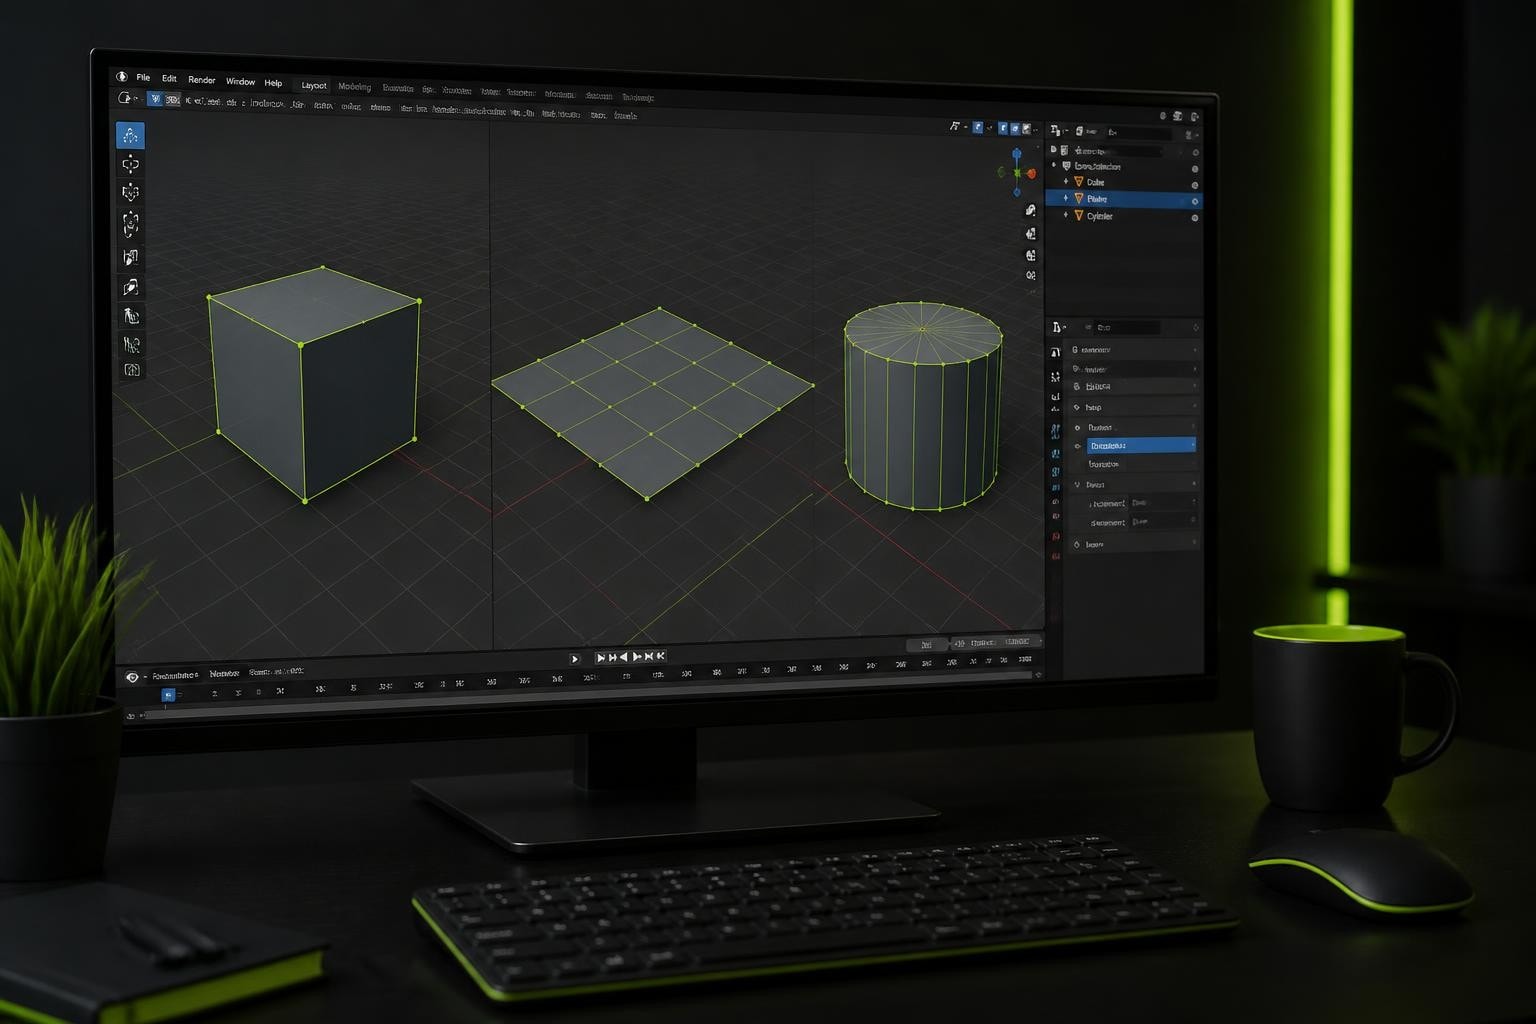
Precision is the foundation of professional 3D modeling. When you're building game assets, architectural models, or stylized environments, even minor misalignments compound into messy geometry, difficult UV unwrapping, and frustrating cleanup work. The blender snap to grid feature solves this problem by constraining movements, rotations, and scaling operations to defined increments, ensuring every vertex lands exactly where you intend. Understanding how to leverage grid snapping transforms chaotic modeling sessions into controlled, predictable workflows that save hours of manual adjustment and produce cleaner results from the start.
Understanding Grid Snapping Fundamentals
Blender's snapping system operates across multiple contexts, but grid snapping specifically aligns your geometry to the scene's grid lines. This functionality works in both Object Mode and Edit Mode, giving you precise control whether you're positioning entire meshes or individual vertices.
The grid itself is a visual reference system based on units you define in your scene properties. By default, Blender uses one Blender unit per grid square, but you can adjust this to match real-world measurements for architectural work or game engine requirements.
Core Snapping Controls
The snapping toolbar sits at the top of the 3D Viewport, displaying several icons that control behavior:
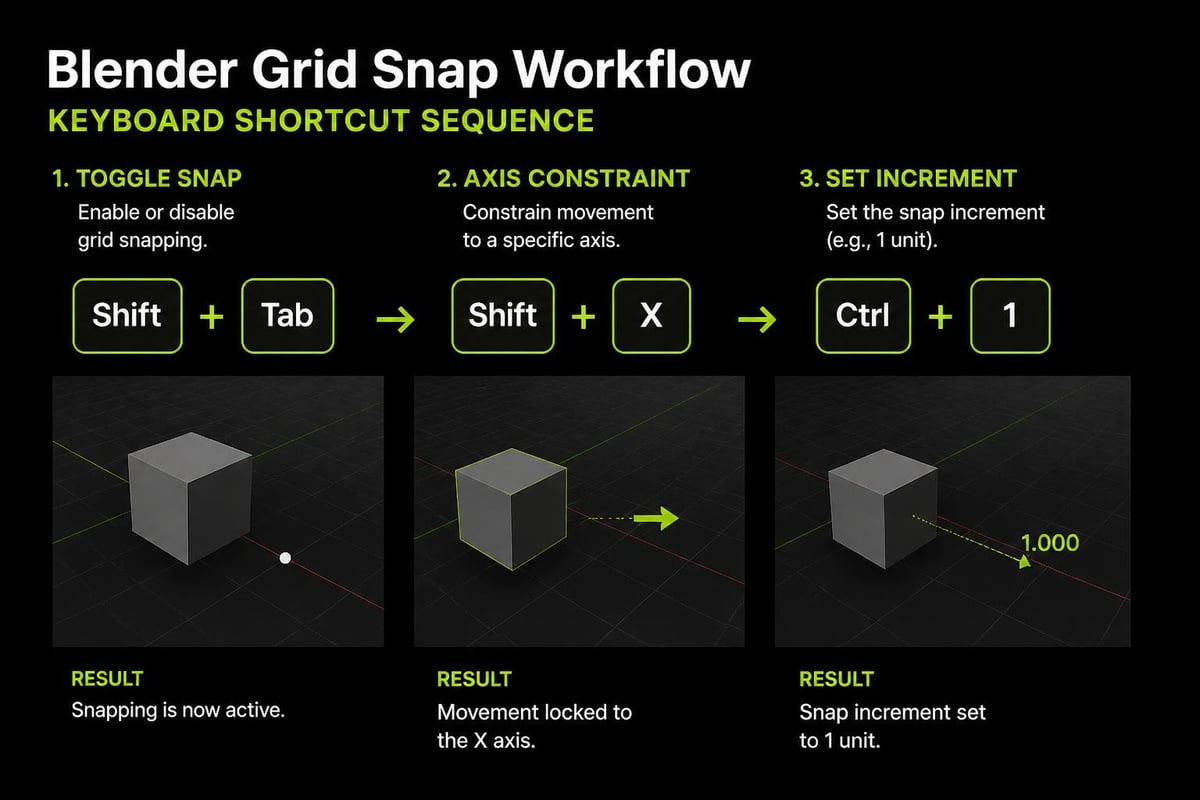
- Magnet icon: Toggles snapping on and off (Shift+Tab shortcut)
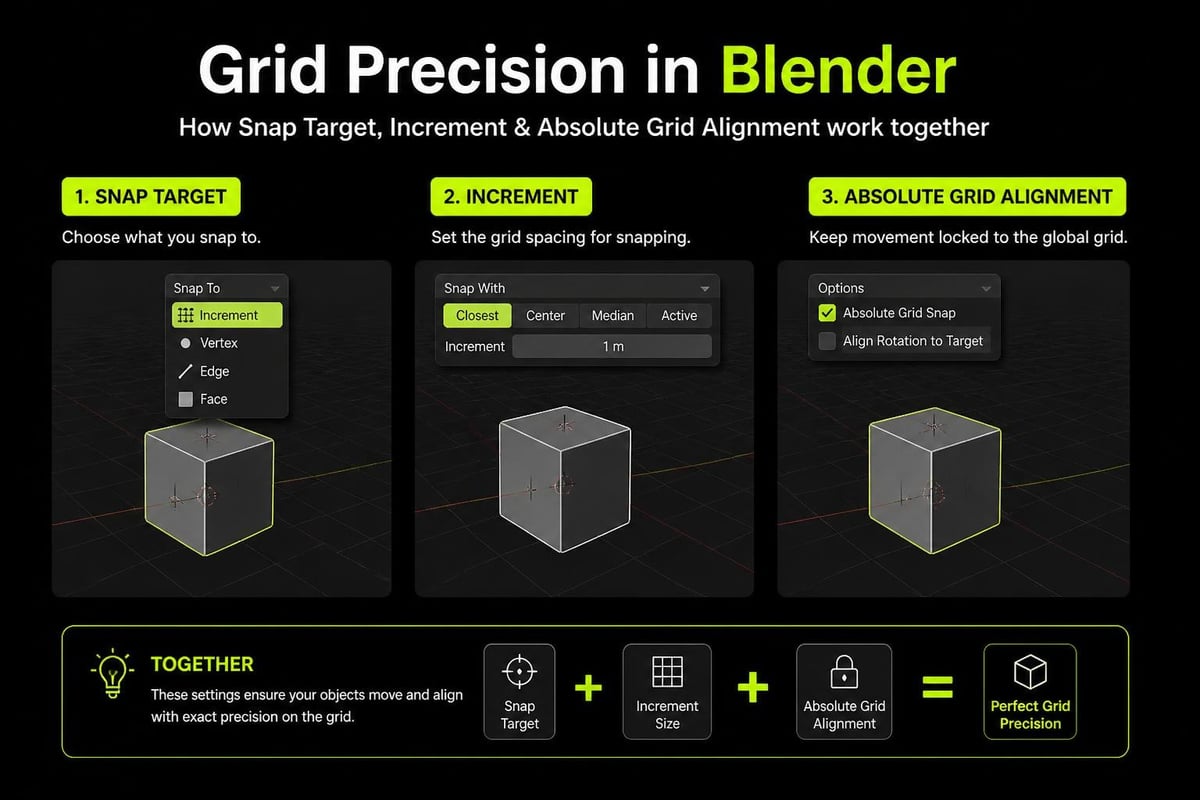
- Target dropdown: Selects what you're snapping to (increment, vertex, edge, face, volume)
- Affect dropdown: Determines which elements snap (active, median, center, closest)
- Absolute Grid Snapping checkbox: Forces alignment to world grid origin
When you select "Increment" as your snap target, you enable blender snap to grid functionality. The system then constrains transformations to multiples of your grid spacing, creating perfectly aligned geometry without manual adjustment.
Absolute versus Relative Snapping
Understanding the difference between absolute and relative grid snapping is crucial for production work. According to the absolute grid snapping feature documentation, this functionality fundamentally changed how artists achieve precision.
Relative snapping moves your selection by grid increments from its current position. If a vertex sits at 1.3 units and you move it with 0.5-unit grid spacing, it snaps to 1.5, 2.0, 2.5, and so on. The original offset is preserved.
Absolute snapping ignores current position and forces alignment to the world grid origin. That same vertex at 1.3 units would snap to 1.0, 1.5, 2.0, based on your grid settings. This is essential when building modular assets that must align perfectly across multiple objects.
| Snapping Type | Starting Position | Grid Size | First Snap Position | Use Case |
|---|---|---|---|---|
| Relative | 1.3 units | 0.5 units | 1.5 units | Quick adjustments |
| Absolute | 1.3 units | 0.5 units | 1.0 units | Modular alignment |
| Relative | 0.7 units | 0.25 units | 0.75 units | Incremental moves |
| Absolute | 0.7 units | 0.25 units | 0.75 units | Grid registration |
Setting Up Grid Snapping for Production
Production environments demand consistent settings across projects. Establishing grid snapping configurations early prevents incompatibility between assets and reduces technical overhead during assembly.
Configuring Grid Increments
Your grid increment determines the smallest unit of movement. Game developers typically work with specific grid sizes that match their engine's collision systems and tile-based layouts.
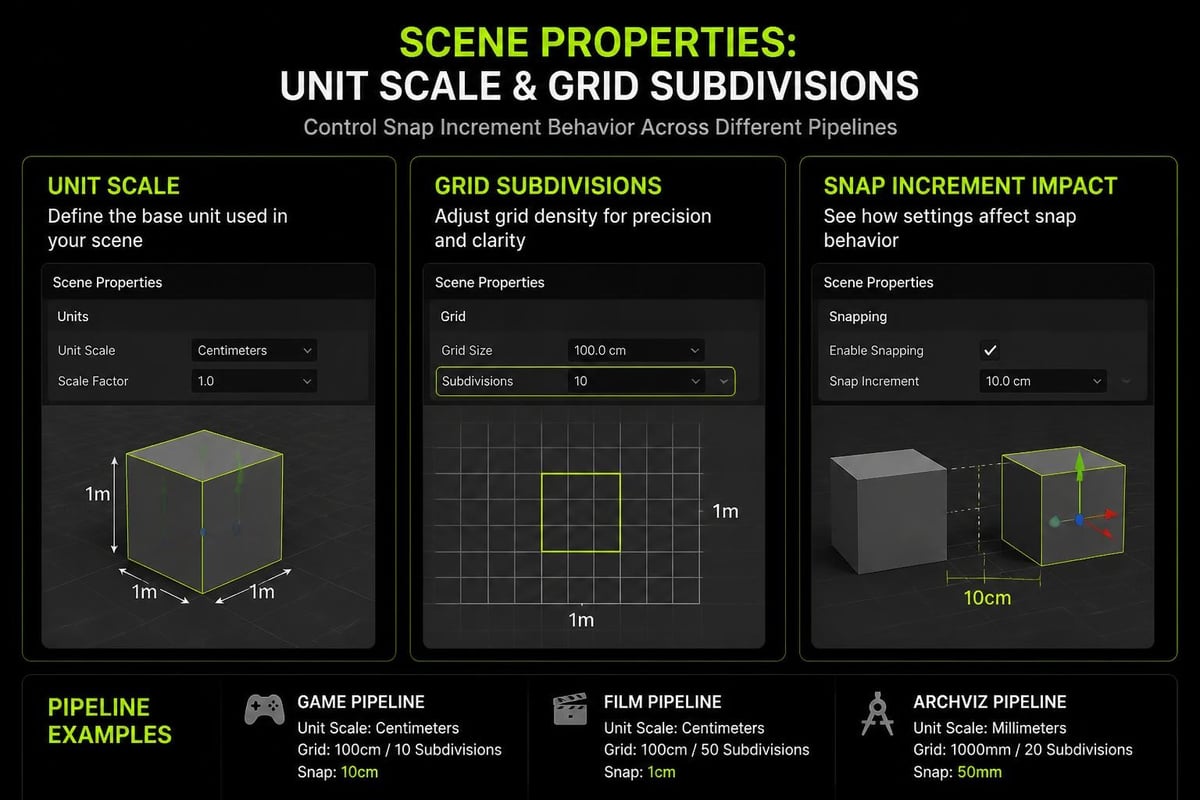
Navigate to the snapping controls and enable the magnet icon. Select "Increment" from the snap target dropdown. The increment size defaults to your viewport grid spacing, but you can override this in the Overlay properties under Grid Scale.
For modular game assets, common grid sizes include:
- 0.5 units: Detailed architectural elements
- 1.0 unit: Standard modular pieces
- 2.0 units: Large structural components
- 0.25 units: Precision mechanical parts
When working on stylized low poly assets, larger grid increments often suffice since vertex precision matters less than silhouette and form. The blender snap to grid system adapts to whatever scale your project demands.
Scene Scale Considerations
Before enabling grid snapping, verify your scene scale matches your target platform. Blender defaults to metric units, but game engines like Unity and Unreal have specific scale expectations.
Check your Scene Properties panel under Units. Set Length to match your engine requirements. This ensures grid snapping increments translate correctly when exporting FBX or other interchange formats.
Practical Grid Snapping Workflows
Theory becomes valuable only when applied to real modeling scenarios. These workflows demonstrate how the blender snap to grid feature solves specific production challenges.
Building Modular Architecture
Modular architecture relies on perfectly aligned connection points. Without grid snapping, matching wall segments, floor tiles, and ceiling pieces becomes a frustrating exercise in decimal adjustment.
Enable absolute grid snapping with 1.0-unit increments. Model your first wall segment with dimensions that are exact multiples of your grid size-4 units wide by 3 units tall, for example. Every vertex should land on a grid intersection.
When you duplicate this segment (Shift+D) and move it, the blender snap to grid system ensures perfect alignment. No gaps, no overlaps, just clean connections. The Blender manual's snap functionality page provides additional context on these operations.
Precision Retopology Alignment
Retopology workflows benefit significantly from grid snapping when building quad-based topology over sculpted meshes. Although tools like RetopoSketch streamline the retopology process with stroke-based quad mesh creation, understanding grid snapping provides additional control for aligning edge loops to specific increments.
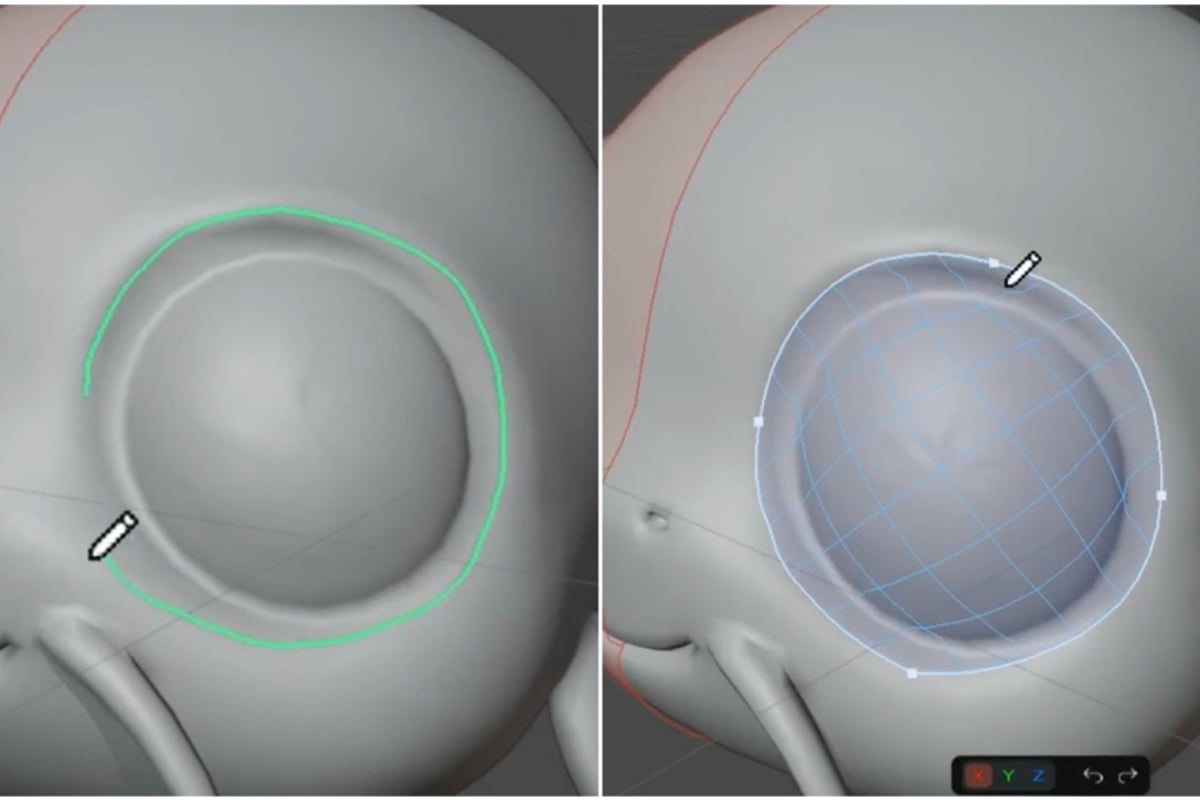
Set a fine grid increment-0.1 or 0.05 units-and enable vertex snapping alongside grid snapping. This combination lets you align new topology to both the underlying surface and predictable grid positions, creating cleaner edge flow that's easier to manage during subdivision.
UV Layout Organization
The blender snap to grid feature extends beyond 3D modeling into UV editing. The UV Editor snapping documentation details how grid snapping helps organize texture layouts.
Switch to the UV Editor and enable grid snapping with 0.5 increments. This forces UV islands to align to texture-space grid lines, simplifying atlas packing and ensuring pixel-perfect alignment for palette texture workflows.
When building texture atlases for games, this precision reduces texture bleeding and makes debugging UV issues substantially easier. Islands snap to predictable positions rather than floating at arbitrary coordinates.
Advanced Grid Snapping Techniques
Beyond basic alignment, experienced artists leverage grid snapping for sophisticated modeling operations that would otherwise require manual calculation.
Proportional Grid Snapping
Combining proportional editing with grid snapping creates controlled organic deformations that still respect grid alignment. Enable both features simultaneously-proportional editing with your scroll wheel to adjust falloff, and grid snapping for positional control.
This technique is particularly valuable when adjusting terrain meshes or creating stylized character forms that need to maintain specific dimensional requirements. The proportional falloff creates smooth transitions while grid snapping keeps overall dimensions precise.
Multi-Axis Constraints
Grid snapping respects axis constraints (X, Y, Z keys during transforms). Press G to move, then X to constrain to the X-axis, and your movement snaps along that axis in grid increments.
For more complex constraints, use custom transform orientations. Create an orientation based on a face or edge, then enable grid snapping. Your movements now snap to grid increments aligned to that custom orientation rather than world axes.
Key combinations for efficient snapping:
- G + X + 2: Move 2 grid units along X-axis
- R + Z + 45: Rotate 45 degrees around Z-axis (with rotation snapping)
- S + Shift+Z + 0.5: Scale 50% on XY plane only
- G + Shift+Z: Move freely on XY plane with grid snapping
Snapping During Extrusion
Extrude operations (E key) respect active snapping settings. When you extrude a face with blender snap to grid enabled, the new geometry moves in grid increments from the original surface.
This is essential for hard-surface modeling where each extrusion must maintain specific depth relationships. A mechanical panel might have recessed buttons at exactly 0.1 units deep, with surrounding frames at 0.05 units-grid snapping enforces these relationships automatically.
Troubleshooting Grid Snapping Issues
Even experienced users encounter situations where grid snapping behaves unexpectedly. Understanding common issues and their solutions maintains workflow momentum.
Vertices Won't Snap to Grid
The most frequent complaint involves vertices that refuse to snap despite enabled settings. This typically occurs when using relative snapping with geometry that's already off-grid.
Solution: Enable absolute grid snapping. This forces alignment to world grid origin regardless of current position. Select your geometry, enable absolute snapping, then perform a minimal move (tap G and click) to trigger the snap.
Alternatively, select all vertices (A key) and use Mesh > Snap > Selection to Grid from the header menu. This operation immediately aligns all selected elements to the nearest grid intersection.
Inconsistent Snap Behavior
Sometimes snapping works for certain operations but not others. This usually indicates conflicting snap targets or incorrect snap element settings.
Check your "Affect" dropdown in the snapping controls. If set to "Active," only the active element snaps. Change to "Median" or "Center" for more predictable behavior. The RenderGuide tutorial covers these configuration details extensively.
Performance Impact
Complex scenes with thousands of vertices can experience lag when grid snapping is enabled, particularly with vertex or edge snap targets active simultaneously.
Optimization approach: Disable unnecessary snap targets. If you only need grid snapping, turn off vertex, edge, and face snapping. Use the backface culling option to reduce calculation overhead on dense meshes.
For extremely complex scenes, consider modeling modular pieces separately with grid snapping, then assembling them with snap-to-vertex instead.
Grid Snapping for Different Modeling Styles
Different artistic approaches benefit from grid snapping in distinct ways. Adapting your snapping strategy to your modeling style improves efficiency.
Hard Surface Modeling
Hard surface work demands absolute precision. Panel gaps, mechanical tolerances, and symmetrical features all require exact measurements that grid snapping provides naturally.
Use tight grid increments (0.1 to 0.5 units) with absolute snapping enabled. Model with the grid visible (Shift+Tab to toggle overlays) so you can visually confirm alignment. Every extrusion, inset, and bevel operation should respect grid positions.
For CAD-like precision, consider specialized CAD plugins that enhance Blender's mechanical modeling capabilities alongside grid snapping.
Stylized Character Modeling
Stylized characters balance organic forms with geometric clarity. Grid snapping helps maintain proportions and symmetry without making models feel rigid or mechanical.
Use larger grid increments (0.5 to 2.0 units) to establish major proportions-head width, torso length, limb dimensions. Then disable snapping for detail work where organic variation matters more than exact positioning.
The blender snap to grid feature is particularly useful for establishing body landmarks at the blockout stage, ensuring proportions remain consistent across multiple characters in a production.
Environment and Level Design
Game environments benefit enormously from grid-based workflows. Tile-based levels, modular buildings, and terrain systems all rely on precise alignment.
| Environment Type | Grid Size | Snapping Mode | Priority Focus |
|---|---|---|---|
| Interior architectural | 1.0 units | Absolute | Wall alignment |
| Exterior buildings | 2.0 units | Absolute | Modular assembly |
| Terrain tiles | 4.0 units | Absolute | Seamless edges |
| Prop placement | 0.5 units | Relative | Spacing variation |
Combine grid snapping with array modifiers to create repeating structures that maintain perfect spacing. Enable snapping, position your first element, then configure the array modifier with offsets that match your grid increments.
Keyboard Shortcuts and Speed Optimizations
Efficiency comes from minimizing UI interaction. These shortcuts and techniques accelerate grid snapping workflows significantly.
Essential Keyboard Combinations
- Shift+Tab: Toggle snapping on/off
- Shift+Ctrl+Tab: Open snap menu for quick target switching
- G then X/Y/Z then number: Move exact grid units along axis
- Ctrl during transform: Temporarily enable/disable snapping
- N panel > Tool tab: Access detailed snap settings
The Blender official documentation provides comprehensive shortcut references, but muscle memory comes from consistent practice.
Custom Keymap Modifications
For production environments, consider customizing snap shortcuts in Edit > Preferences > Keymap. You can assign specific snap targets to single keystrokes rather than cycling through the dropdown menu.
Advanced users create custom snap presets-saved configurations that combine snap target, absolute/relative mode, and increment size-then map them to quick access keys.
Integrating Grid Snapping with Other Tools
The blender snap to grid system works in concert with other Blender features, creating powerful combined workflows.
Snapping Plus Modifiers
Array and mirror modifiers respect grid-snapped base geometry. When you model an asset with grid snapping, then apply an array modifier, the repeated instances maintain that grid alignment throughout the array.
This is critical for creating game-ready tilesets. Model one tile with perfect grid alignment, array it in both X and Y directions with grid-based offsets, and you have an entire terrain sheet that tiles seamlessly.
Addon Integration
Many Blender addons enhance or depend on grid snapping functionality. Tools focused on game development, architecture, and technical modeling often provide additional snapping options that complement Blender's native system.
When using workflow addons like those featured on Saved Pixel's blog, grid snapping ensures compatibility between addon-generated geometry and your manually modeled elements. The consistent grid alignment means procedural and manual work integrate seamlessly.
Export Considerations
Grid-snapped geometry exports cleanly to game engines with minimal position adjustment needed. FBX and other formats preserve exact vertex positions, and since those positions align to grid increments, they often match the engine's own snap settings.
Before export, verify all loose vertices are grid-aligned. Select all (A key), then Mesh > Clean Up > Merge by Distance with a very small threshold (0.0001). This eliminates any near-duplicate vertices that might have escaped grid snapping.
Grid Snapping Across Blender Versions
The blender snap to grid feature has evolved significantly across Blender releases. Understanding version differences helps when working with legacy files or following older tutorials.
Blender 2.76 introduced absolute grid snapping, as demonstrated in this foundational video. Prior versions only supported relative snapping, making modular alignment considerably more difficult.
Blender 2.8+ reorganized the snapping UI, moving controls from the bottom toolbar to the top viewport header. The functionality remained largely identical, but muscle memory required adjustment.
Current Blender 2026 versions include enhanced snapping visualization, showing exactly which grid line your geometry will snap to during transformations. This real-time feedback reduces errors and speeds up precision modeling significantly.
When collaborating across studios or following tutorials from different years, verify which snapping mode the instruction assumes. Many legacy tutorials demonstrate workarounds that are unnecessary with modern absolute snapping.
Production-Ready Grid Snapping Practices
Professional workflows require consistent application of grid snapping principles across entire projects. These practices ensure team compatibility and asset quality.
Establishing Studio Standards
Define project-wide grid increments during preproduction. Document these in your technical art guidelines alongside texture resolution standards, polygon budgets, and naming conventions.
A typical game project might specify:
- Character blockouts: 0.5-unit grid
- Environment modules: 1.0-unit grid
- Prop placement: 0.25-unit grid (relative snapping acceptable)
- Interior architecture: 0.1-unit grid for detail areas
Consistency across the team means assets integrate without position adjustment, and level designers can confidently place elements knowing they'll align.
Quality Assurance Checks
Before submitting assets, verify grid alignment through these validation steps:
- Enable absolute grid snapping with project standard increment
- Select all geometry (A key)
- Tap G and immediately click to trigger snap
- Check if any vertices moved (indicates off-grid geometry)
- Review edge loops for consistent spacing
- Test modular connections with duplicate pieces
Assets that pass these checks integrate smoothly into production pipelines without requiring revision.
Version Control Considerations
Grid-snapped models produce cleaner version control diffs because vertex positions change in predictable increments rather than arbitrary floating-point adjustments. This makes reviewing geometry changes more meaningful and reduces merge conflicts when multiple artists work on related assets.
When working with texture workflows that depend on precise UV alignment, grid snapping in both 3D and UV space ensures texture updates don't require geometry modifications.
Mastering the blender snap to grid feature transforms imprecise guesswork into controlled, professional modeling workflows. From modular architecture to stylized game assets, grid snapping ensures geometry aligns predictably while reducing cleanup time and technical debt. The precision these techniques provide becomes foundational to production efficiency, letting you focus on creative decisions rather than manual vertex adjustment. Saved Pixel develops tools that extend this principle of workflow precision, building addons from real production challenges to help artists work faster and cleaner without fighting their software.