 Get Palette Grid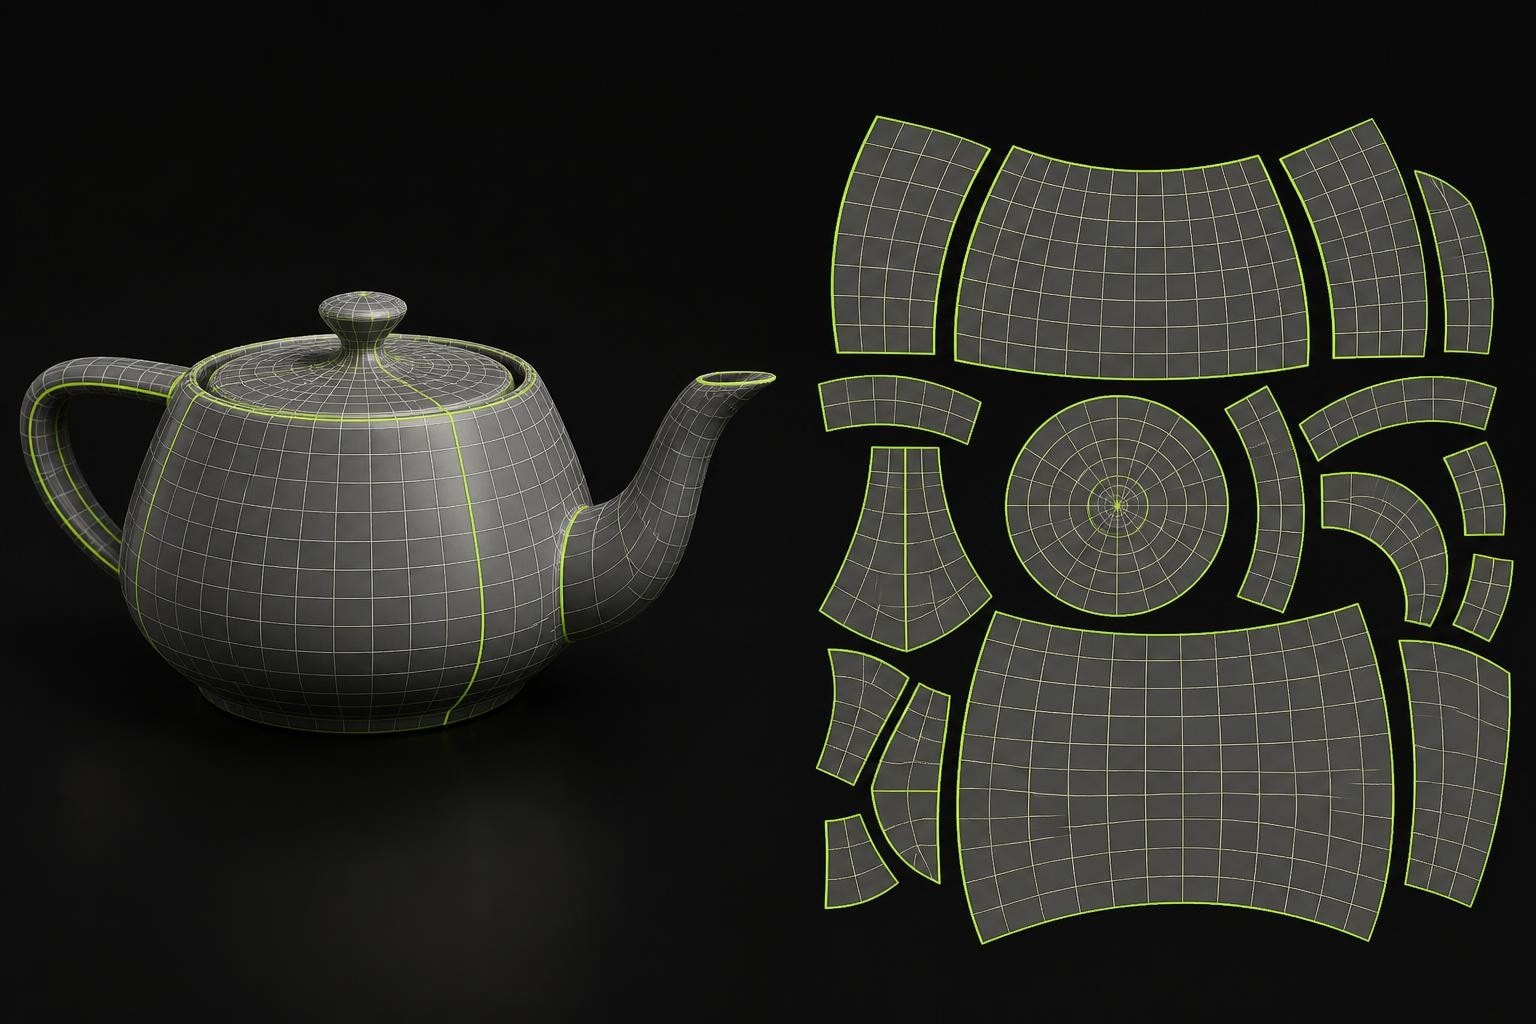
Blender texture uv mapping forms the foundation of how 3D artists apply detailed textures to models in production environments. Whether you're creating game assets, animated characters, or architectural visualizations, understanding how to efficiently unwrap and map textures determines the quality and performance of your final output. This process translates three-dimensional geometry into two-dimensional texture space, allowing you to paint, edit, and apply images with precision. For professionals working on tight deadlines, mastering these techniques means faster iteration cycles and cleaner asset pipelines.
Understanding UV Mapping Fundamentals
Blender texture uv mapping operates by flattening a 3D mesh into a 2D representation that corresponds to texture coordinates. The term "UV" refers to the horizontal (U) and vertical (V) axes of texture space, distinguishing them from the XYZ coordinates of 3D space. Every vertex on your mesh receives UV coordinates that determine which part of your texture image appears at that location.
The UV Editor in Blender provides the primary interface for viewing and manipulating these coordinates. This editor displays your unwrapped mesh alongside the texture image, allowing real-time adjustments to how textures align with geometry. Understanding this relationship prevents common issues like stretching, distortion, and misaligned details.
Why UV Mapping Matters for Production
Professional workflows demand efficient UV layouts for several critical reasons:
- Texture budget optimization: Properly packed UVs maximize texture resolution usage
- Consistent texel density: Uniform UV scaling ensures even detail across the entire model
- Simplified texture painting: Clean unwraps make hand-painting and procedural texturing predictable
- Reduced draw calls: Shared texture atlases improve runtime performance in game engines
Game developers particularly benefit from strategic UV mapping because texture memory directly impacts frame rates and loading times. A single well-organized texture atlas can replace dozens of individual material assignments, reducing state changes during rendering.
Seam Placement Strategies
Marking seams defines where Blender cuts your mesh during the unwrapping process. Strategic seam placement determines whether your UV islands unwrap with minimal distortion or produce unusable results. The goal is balancing visual continuity against geometric accuracy.
Where to Place Seams
Natural hiding spots include areas where texture discontinuities won't be visible during typical viewing angles. Hard edges, panel separations, and areas facing away from the camera make ideal seam locations. For organic models like characters, place seams along the back, underarms, and inside legs where they remain hidden during animation.
Topological considerations matter when working with symmetrical models. Place seams down the centerline to enable symmetrical UV unwrapping, which halves your texturing workload. This approach works exceptionally well for characters, vehicles, and architectural elements with bilateral symmetry.
Loop-based seaming follows edge loops to create clean, predictable unwraps. Select an edge loop using Alt+Click, then mark the seam with Ctrl+E > Mark Seam. This method creates continuous seams that follow the model's natural topology, resulting in more rectangular UV islands that pack efficiently.
| Seam Location | Best For | Distortion Risk |
|---|---|---|
| Hard edges | Mechanical models | Low |
| Symmetry lines | Characters, vehicles | Very Low |
| Behind geometry | All organic forms | Low |
| Random placement | N/A | Very High |
Unwrapping Methods Compared
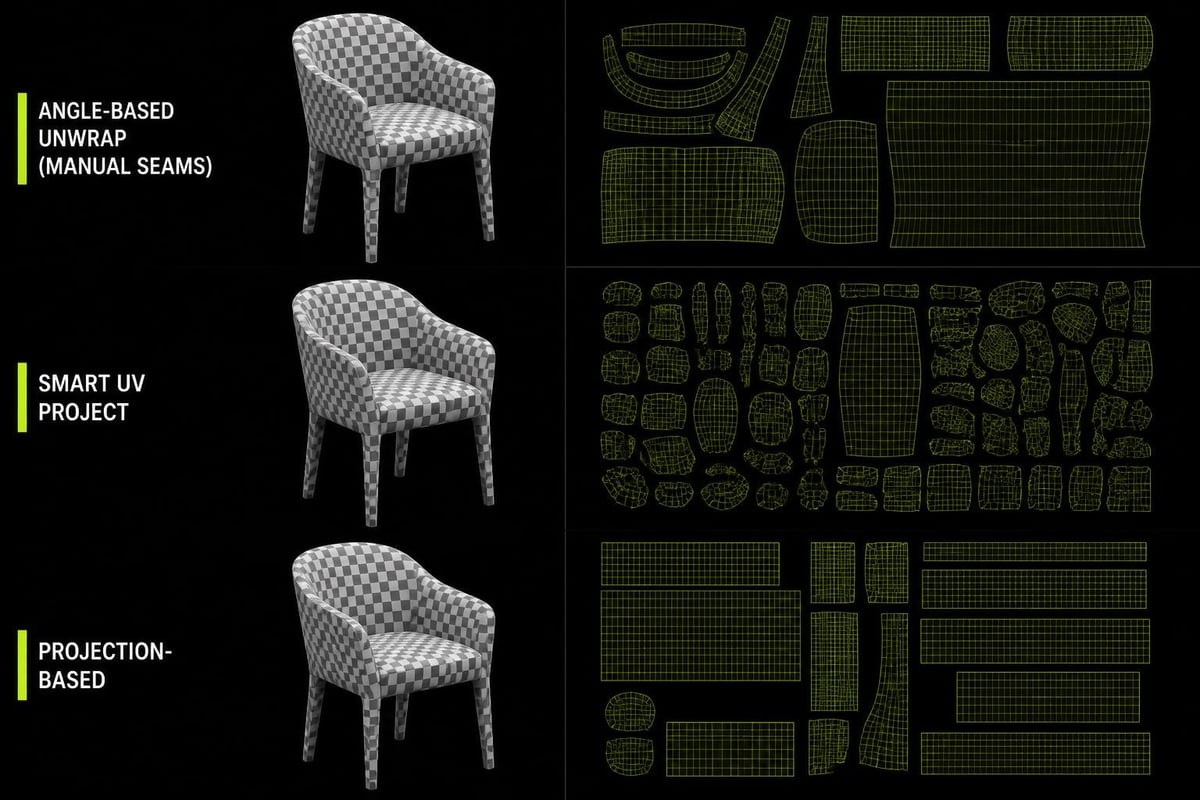
Blender offers several unwrapping algorithms, each optimized for different geometry types. Choosing the correct method for your specific model saves time and produces superior results.
Angle-Based Unwrapping
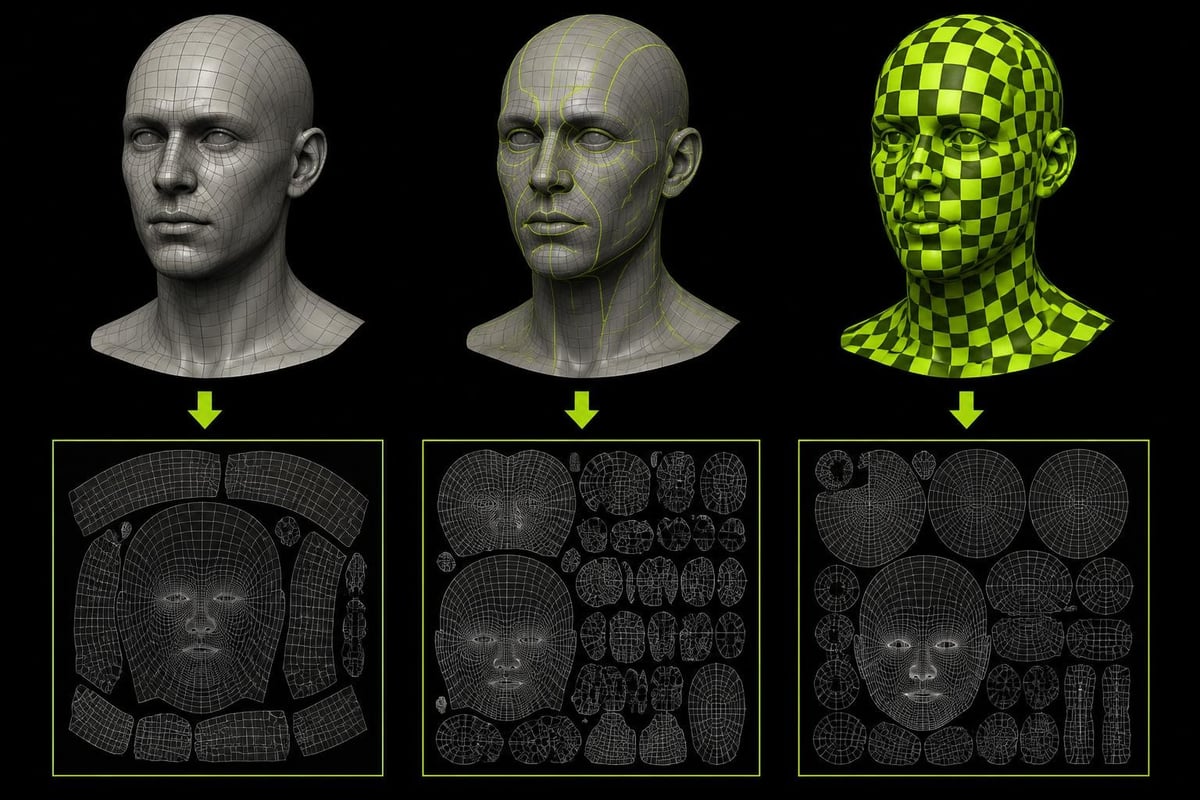
The standard Unwrap operator (U > Unwrap) uses angle-based algorithms to minimize distortion. This method analyzes the angles between faces and attempts to preserve them in 2D space. It works best when you've marked logical seams that define natural surface boundaries.
For detailed UV mapping workflows, this remains the most versatile option because it respects your seam placement decisions while automatically calculating optimal UV coordinates within those constraints.
Smart UV Project
Smart UV Project automatically calculates seams based on face angles without requiring manual seam marking. This method works well for quick previews or mechanical objects with many distinct surfaces. However, it typically generates numerous small UV islands that complicate texture painting and packing.
The angle limit parameter controls how aggressively the algorithm splits surfaces. Lower values create more islands with less distortion, while higher values produce fewer islands with potentially more stretching.
Specialized Unwrapping Techniques
Cube Projection maps faces to the nearest side of a virtual cube surrounding your object. This works perfectly for box-like objects but produces severe distortion on curved surfaces. Use it for architectural elements, containers, and other rectilinear geometry.
Cylinder and Sphere Projection handle curved surfaces that approximate these primitive shapes. Cylinder projection suits arms, legs, and columns, while sphere projection works for heads and rounded objects. Both require careful alignment of the projection axis with your model's orientation.
Follow Active Quads copies the UV layout from one active quad face to adjacent quad faces, following the topology flow. This proves invaluable for creating evenly spaced UV grids on curved surfaces like vehicle bodies or character torsos.
Optimizing UV Layouts
After unwrapping, optimizing your UV layout ensures maximum texture efficiency and minimal distortion. This phase separates amateur work from production-ready assets.
Checking for Distortion
The UV Editing workspace includes a stretching overlay that visualizes distortion using color gradients. Blue areas indicate compressed UVs where texture detail gets wasted, while red areas show stretched UVs where pixelation becomes visible. Aim for predominantly green coloring across all UV islands.
Texel density measures how many texture pixels correspond to each unit of 3D space. Inconsistent texel density creates jarring detail variations across your model. A character's head might appear sharp while their hands look blurry if UV scaling differs significantly between these areas.
To maintain uniform texel density:
- Select all UV islands (A in the UV Editor)
- Use the Average Islands Scale operator
- Manually adjust individual islands if certain areas require more detail
- Compare against reference values for your target platform
UV Island Packing
Efficient packing maximizes texture resolution usage while maintaining adequate padding between islands. Blender's Pack Islands operator (Ctrl+P in the UV Editor) automatically arranges UVs to minimize wasted space.
Padding settings determine the gap between UV islands, preventing color bleeding during texture filtering. Game assets typically require 4-8 pixels of padding depending on texture resolution and mipmap generation. Animation models may need additional padding in high-deformation areas.
Manual adjustments often improve automatic packing results. Group related UV islands together for easier texture painting, orient islands to align with texture details, and scale important areas slightly larger to receive more resolution.
Advanced Layout Techniques
UDIM workflows split UVs across multiple texture tiles, each occupying a separate integer square in UV space. This approach allows extremely high-resolution texturing for hero assets like film characters, where different body parts receive dedicated 4K or 8K texture maps.
Texture atlasing combines multiple objects or material types into a single texture, reducing draw calls in real-time applications. Carefully plan atlas layouts during the UV stage to accommodate all required variations while maintaining consistent texel density across different objects.
Applying and Testing Textures
Once your UVs are unwrapped and optimized, applying image textures validates your work and reveals any remaining issues. This testing phase catches problems before you invest time in detailed texturing.
Setting Up Materials
Create a new material and add an Image Texture node connected to the Base Color of a Principled BSDF shader. In the UV Editor, create or load a test texture that includes checkerboard patterns, text, or numbered grids. These patterns immediately reveal stretching, seam misalignment, and scale inconsistencies.
Switch your viewport shading to Material Preview or Rendered mode to see textures on your model. Rotate the view to examine all surfaces, particularly around seams where texture discontinuities become most visible. Proper seam placement should make seam locations difficult to detect under normal viewing conditions.
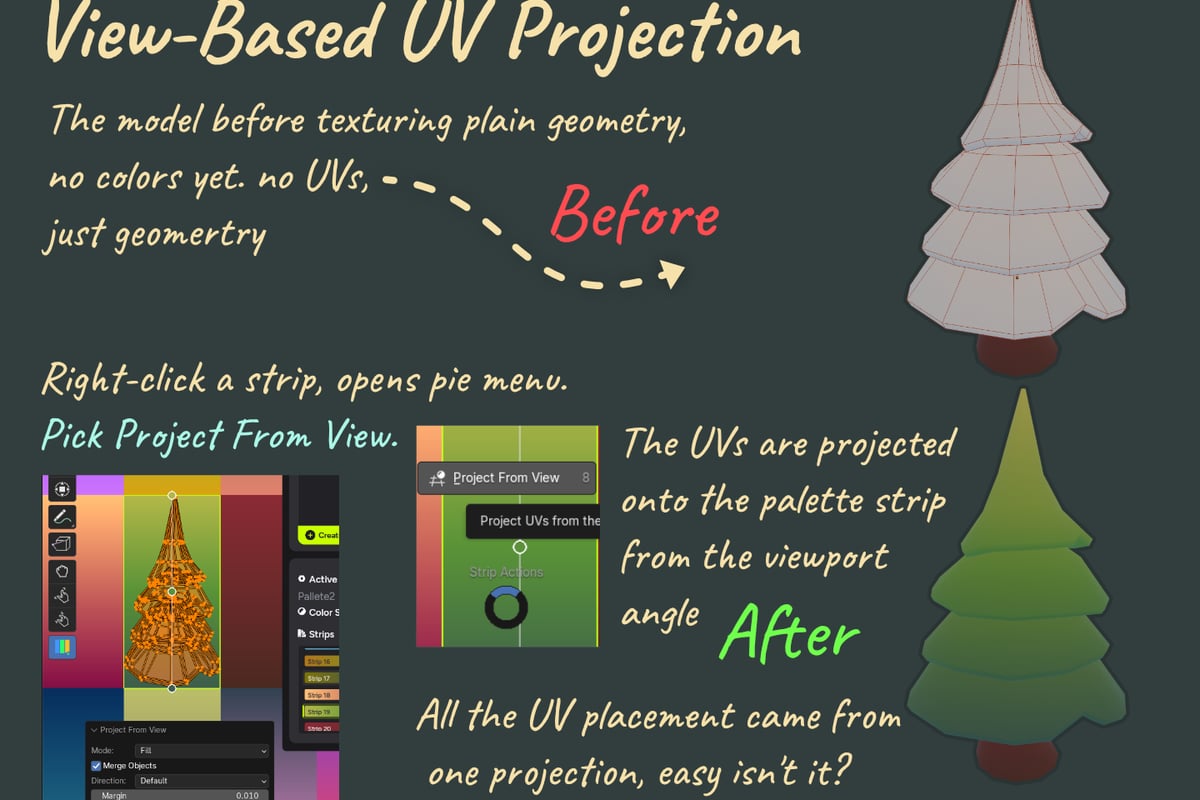
For game development workflows, artists often benefit from specialized tools that streamline specific texturing challenges. When working with stylized art that relies on gradient palette textures, setting up color ramps and maintaining consistent palette application across multiple meshes can become tedious through standard UV approaches. Palette Grid addresses this by letting artists create and edit palette textures directly in Blender, eliminating the export/import cycle and providing instant visual feedback as palette colors change.
Common UV Problems and Fixes
Seam visibility occurs when texture pixels don't align perfectly across seam edges. This happens most often with tileable textures or when UV islands are packed too tightly. Increase padding between islands and ensure seams follow areas where small discontinuities remain hidden.
Stretching artifacts appear when UV areas are scaled disproportionately to their 3D surface area. Use the stretching overlay to identify problem areas, then either adjust seam placement to better match the surface's natural boundaries or use pin vertices to constrain specific UV points during unwrapping.
Overlapping UVs create unpredictable texture results unless intentionally used for symmetrical models. The UV Editor's overlapping display mode highlights these areas. For symmetrical workflows, overlapping is desired; for unique texturing, overlaps indicate errors requiring seam additions or unwrap corrections.
| Issue | Visual Symptom | Solution |
|---|---|---|
| Stretching | Elongated texture details | Improve seam placement, re-unwrap |
| Seam visibility | Texture discontinuities | Increase padding, adjust placement |
| Inconsistent density | Variable detail sharpness | Average island scale, manual adjustment |
| Overlapping UVs | Texture mixing | Add seams, unwrap separately |
Production Workflows and Best Practices
Professional blender texture uv mapping integrates into larger asset pipelines where efficiency and consistency matter as much as technical quality. Developing systematic approaches reduces errors and accelerates iteration.
Establishing UV Standards
Define project-wide UV standards before production begins. Document texel density targets, padding requirements, naming conventions, and UV channel assignments for multi-UV workflows. Game projects often use UV0 for primary textures and UV1 for lightmap baking with different unwrapping requirements for each channel.
Naming conventions for UV maps prevent confusion in complex scenes. Use descriptive names like "UV_Diffuse" and "UV_Lightmap" rather than Blender's default "UVMap" naming. This clarity becomes critical when scripting automation or debugging shader networks with multiple UV inputs.
Template files containing pre-configured UV settings, materials, and workspace layouts save setup time across multiple assets. Create templates for common asset types like characters, props, and environments, each optimized for typical UV requirements in that category.
Batch Processing Techniques
When working with modular asset libraries, batch UV processing maintains consistency across hundreds of objects. Python scripting automates repetitive tasks like seam marking patterns, unwrapping with specific settings, and packing with standardized parameters.
For modular architectural systems or kit-bash libraries, align UV islands to a common grid to ensure texture tiling works identically across all pieces. This allows single texture sets to cover entire modular systems, dramatically reducing memory requirements.
Integration with External Tools
While Blender handles most UV tasks internally, some projects benefit from specialized external UV tools for packing optimization or automatic UV generation. Export your unwrapped mesh to FBX or OBJ format, process in the external tool, then re-import the modified UVs back into Blender.
Substance Painter and Mari workflows typically start with Blender-generated UVs, which then receive detailed texture painting in these specialized applications. Ensure your Blender UVs meet these tools' requirements: no overlapping UVs (unless intentional), adequate padding, and consistent orientation.
Understanding how UV mapping fits into the broader asset creation pipeline becomes crucial when you're also managing topology considerations. Artists frequently iterate between modeling, UV mapping, and retopology stages, each informing the others. The retopology process particularly benefits from forward-thinking UV planning, as clean quad topology naturally produces more efficient UV unwraps with fewer distortion issues.
Advanced UV Editing Techniques
Beyond basic unwrapping, Blender provides sophisticated UV manipulation tools that solve specific production challenges and enable creative texturing approaches.
Pinning and Constraint-Based Unwrapping
Pin specific UV vertices (P in UV Editor) to lock their positions during unwrapping operations. This technique proves essential when preserving critical texture alignments like facial features or logo placements while re-unwrapping surrounding areas.
Live Unwrap mode continuously recalculates UVs as you move pinned vertices, providing real-time feedback on how constraint adjustments affect distortion. Use this for fine-tuning specific UV regions without affecting the entire island.
Multi-Resolution UV Workflows
Complex assets sometimes require different UV resolutions for different detail levels. Create multiple UV layers: one optimized for low-resolution base color textures, another for high-resolution detail maps, and potentially a third for specialized effects like emissive patterns or transparency masks.
Layer management in Blender allows naming and organizing these UV sets independently. Each material can reference different UV layers for different texture types, enabling sophisticated layered texturing without UV coordinate conflicts.
Procedural UV Modification
Blender's geometry nodes system can procedurally generate or modify UV coordinates based on geometric properties. This enables advanced techniques like automatic gradient mapping along specific axes, UV-based color variation across instanced objects, or dynamic UV animation for special effects.
For stylized rendering workflows, procedural UV approaches combined with palette-based texturing create distinctive visual styles while maintaining technical efficiency. Recent developments in gradient palette texturing methods demonstrate how specialized tools can streamline these workflows for production environments.
Troubleshooting Complex UV Scenarios
Real production work presents UV challenges that standard tutorials rarely address. Developing troubleshooting skills separates proficient users from true experts.
Non-Manifold Geometry Issues
Non-manifold edges (edges shared by more than two faces) create ambiguous UV unwrapping scenarios. Blender may skip these areas or produce unpredictable results. Run mesh analysis tools to identify and fix non-manifold geometry before UV unwrapping.
Overlapping faces similarly confuse unwrapping algorithms. Remove doubles, recalculate normals, and ensure clean topology throughout your mesh. These mesh hygiene practices prevent mysterious UV problems that waste debugging time.
High-Poly Sculpted Meshes
Sculpted meshes with millions of polygons challenge Blender's UV tools. Unwrap a lower-resolution version first, then transfer those UVs to the high-resolution mesh using data transfer modifiers or mesh baking workflows. This approach maintains UV layout consistency while enabling detailed sculpting.
Alternatively, unwrap after retopology when you've reduced the sculpted detail to a production-appropriate polygon count. This workflow produces cleaner UVs better suited for game engines and real-time rendering.
Animated Character Considerations
Character UVs must accommodate deformation during animation without creating texture swimming or stretching in extreme poses. Test UVs with the rig in various poses, particularly extreme joint bends where stretching becomes most apparent.
Weight-based UV adjustments allocate more UV space to areas with high deformation, providing extra texture resolution where stretching would otherwise reduce quality. This selective resolution distribution optimizes texture budget usage for animated assets.
Mastering blender texture uv mapping transforms technical necessity into creative advantage, enabling efficient texture workflows that scale from individual assets to complete production pipelines. When you combine these UV fundamentals with production-focused tools built by working developers who understand real pipeline challenges, your workflow becomes both faster and more reliable. Saved Pixel develops Blender addons specifically designed to solve these production bottlenecks, from streamlined palette texturing with Palette Grid to upcoming retopology innovations with RetopoSketch, all created from actual game development experience rather than theoretical workflows.