
 Get Palette Grid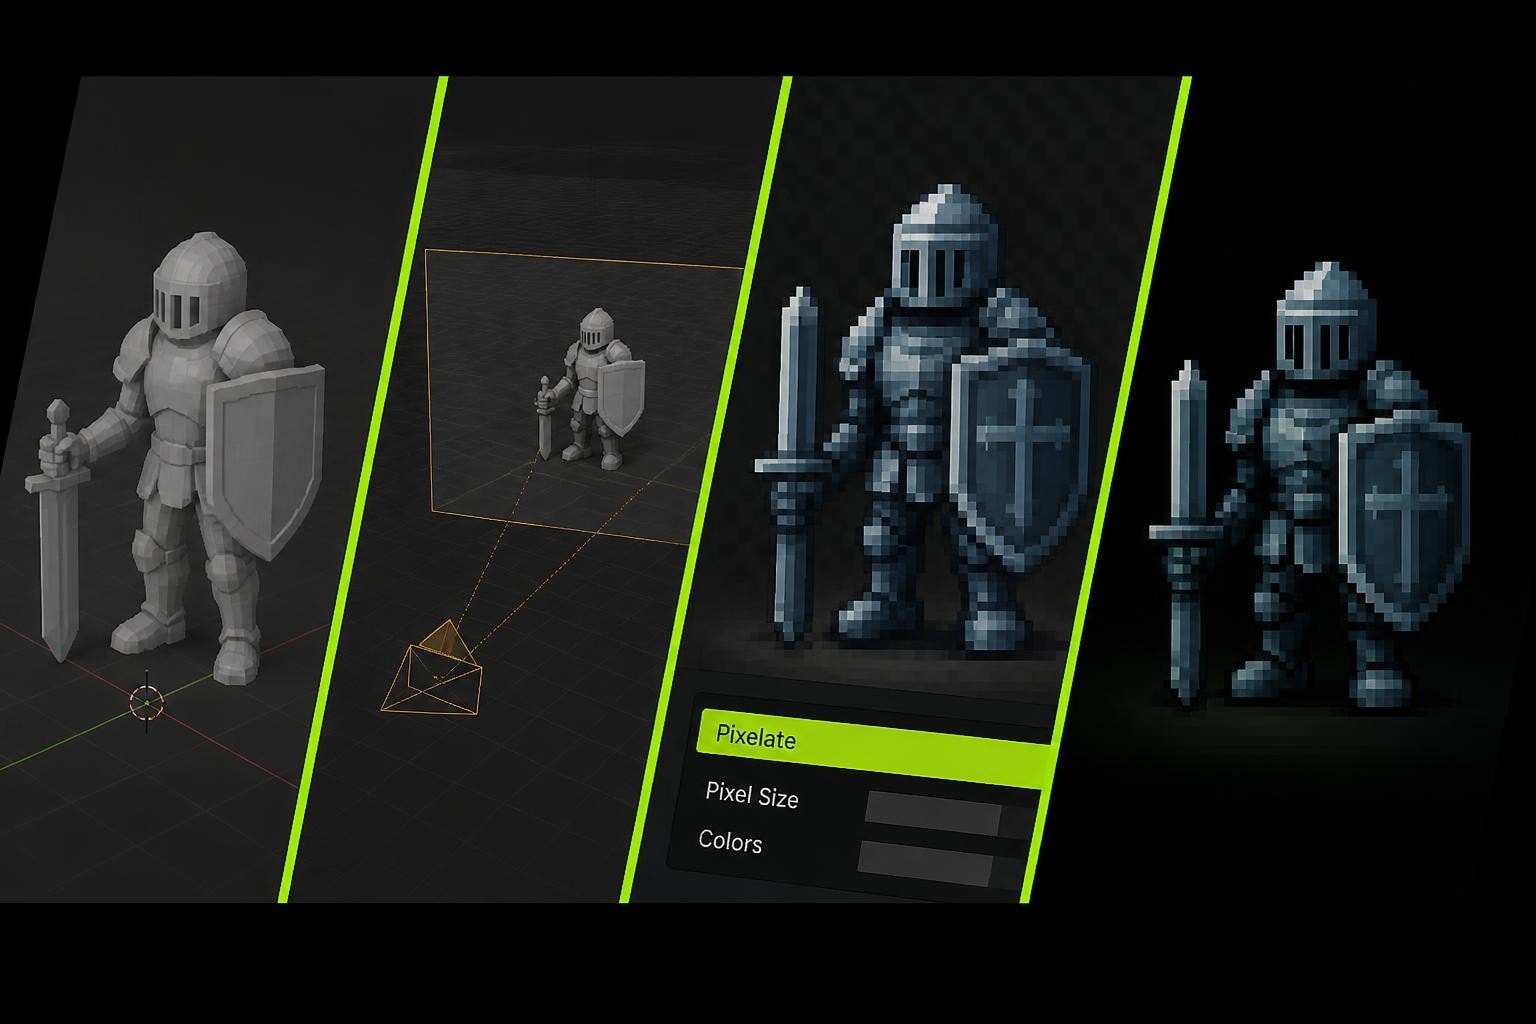
Creating pixel art in Blender combines the precision of 3D modeling with the nostalgic charm of retro aesthetics. While pixel art traditionally lives in the 2D realm, Blender offers unique advantages for artists who want to leverage 3D workflows to generate pixel-perfect sprites, isometric assets, and stylized game graphics. The intersection of 3D modeling and pixel art opens creative possibilities that traditional pixel-pushing alone cannot achieve, from dynamic lighting baked into sprites to perfectly consistent perspective across character animation frames.
Understanding Blender Pixel Art Workflows
Blender pixel art represents a hybrid approach where artists model in three dimensions but render with intentional resolution limitations and color constraints. This workflow shines for game development, where consistent character sprites, environmental tiles, and UI elements require both artistic control and technical efficiency.
The core advantage centers on dimensional accuracy. When you model a character in 3D, every rotation maintains perfect perspective. Traditional pixel artists must redraw each angle by hand, but Blender users simply rotate the camera. This becomes invaluable for games requiring 8-directional character sprites or isometric asset libraries.
Setting Up Your Blender Environment
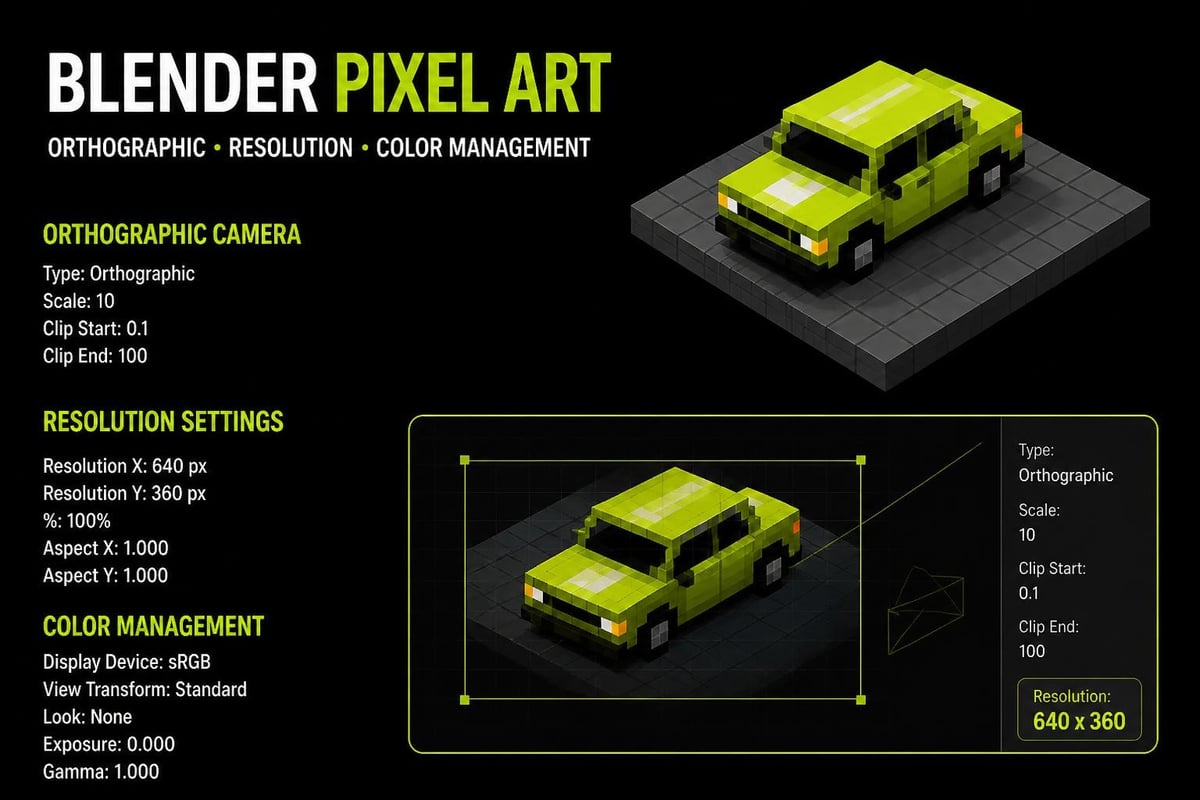
Your workspace configuration directly impacts pixel art quality. Start by setting your render resolution to match your target pixel dimensions exactly. For a 64x64 sprite, set both width and height to 64 pixels in the output properties. Disable motion blur, depth of field, and any anti-aliasing features that would soften edges.
Orthographic cameras work better than perspective for most pixel art applications. Switch your camera to orthographic mode to eliminate perspective distortion, which helps maintain that classic flat pixel art appearance. Position your camera to frame your subject precisely within the render bounds.
Color management requires careful attention. Set your view transform to Standard rather than Filmic to avoid unwanted color grading. Pixel art relies on precise color values, and Filmic's contrast curves can shift your carefully chosen palette in unexpected ways.
Modeling Techniques for Pixel Art Assets
Blender pixel art modeling differs from standard 3D work because your final output resolution constrains visible detail. A highly detailed model becomes muddy when rendered at 32x32 pixels. Instead, focus on bold shapes, clear silhouettes, and strategic detail placement.
Low-poly modeling principles apply directly:
- Keep polygon counts minimal to maintain clean edges when pixelated
- Use flat shading rather than smooth shading for harder transitions
- Design with your final pixel resolution in mind during modeling
- Exaggerate proportions slightly to compensate for pixel limitations
- Build modular pieces that work across multiple sprite variations
Edge flow matters less for pixel art than for animation-ready models. You can prioritize shape readability over topology perfection. However, if you plan to animate your model before rendering sprites, proper topology becomes essential again.
Material and Shading Strategies
Blender's material system offers powerful options for achieving pixel-perfect color control. The Principled BSDF shader works well, but disable subsurface scattering, transmission, and other physically accurate features that add unwanted complexity. Stick to base color, roughness, and metallic values.
Palette textures provide the cleanest approach for stylized pixel art. Rather than painting detailed textures, assign solid colors or simple gradients to different mesh regions. This technique maintains visual clarity at low resolutions while keeping your file sizes minimal.
The Emission shader creates clean, flat colors without lighting calculations affecting the output. This works beautifully for UI elements or game assets that need consistent appearance regardless of scene lighting. Mix Emission with standard shading using color ramps to create cel-shaded effects that pixelate beautifully.
| Material Approach | Best Use Case | Advantages | Limitations |
|---|---|---|---|
| Flat Emission | UI elements, icons | Perfect color consistency | No lighting variation |
| Principled BSDF | Character sprites | Natural shading | Requires careful light setup |
| Vertex Colors | Simple objects | Fast iteration | Limited color control |
| Gradient Mapping | Stylized assets | Artistic flexibility | Setup complexity |
Rendering and Post-Processing Pipeline
The rendering stage transforms your 3D model into actual pixel art. Blender's rendering engines each offer distinct advantages. Eevee provides real-time feedback, making iteration fast when you're testing camera angles or lighting setups. Cycles delivers higher quality when you need precise lighting baked into your sprites.
Compositor Techniques for Pixelation
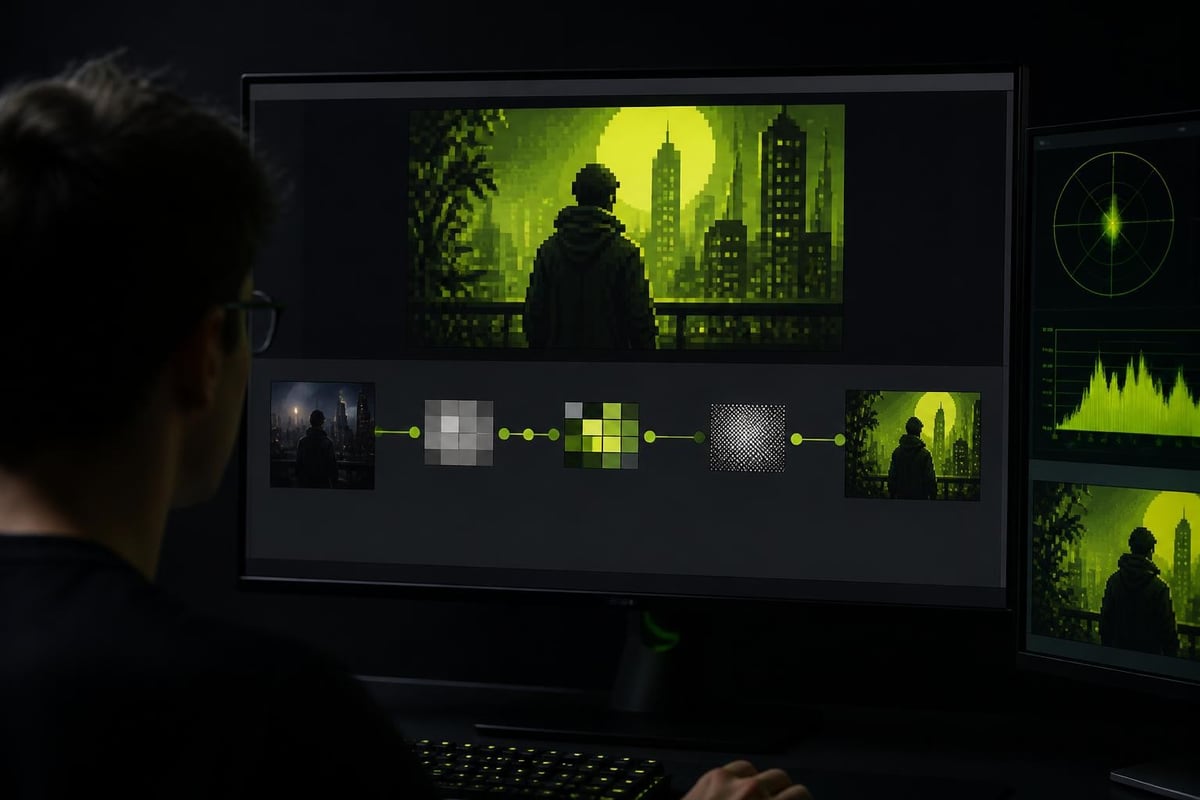
Blender's compositor enables non-destructive pixelation effects. The Pixelate node creates the characteristic blocky appearance, but manual methods often provide better control. This tutorial from BlenderNation demonstrates using the real-time compositor with Eevee for immediate visual feedback.
Create a custom pixelation setup by rendering at high resolution, then scaling down using nearest-neighbor filtering. This preserves hard edges while giving you flexibility to adjust the final pixel density. In the compositor, add a Scale node set to your target resolution with Nearest filter selected.
Color quantization restricts your output to specific palette values. Add a Color Ramp node in the compositor for each color channel, then position color stops to match your desired palette. This technique ensures every pixel uses only approved colors, critical for maintaining authentic pixel art aesthetics.
Dithering patterns add visual texture without increasing color count. The compositor's Dither node creates ordered patterns that blend colors optically. Adjust the dither amount based on your pixel resolution-lower resolutions need less dithering to avoid visual noise.
Advanced Techniques for Game Development
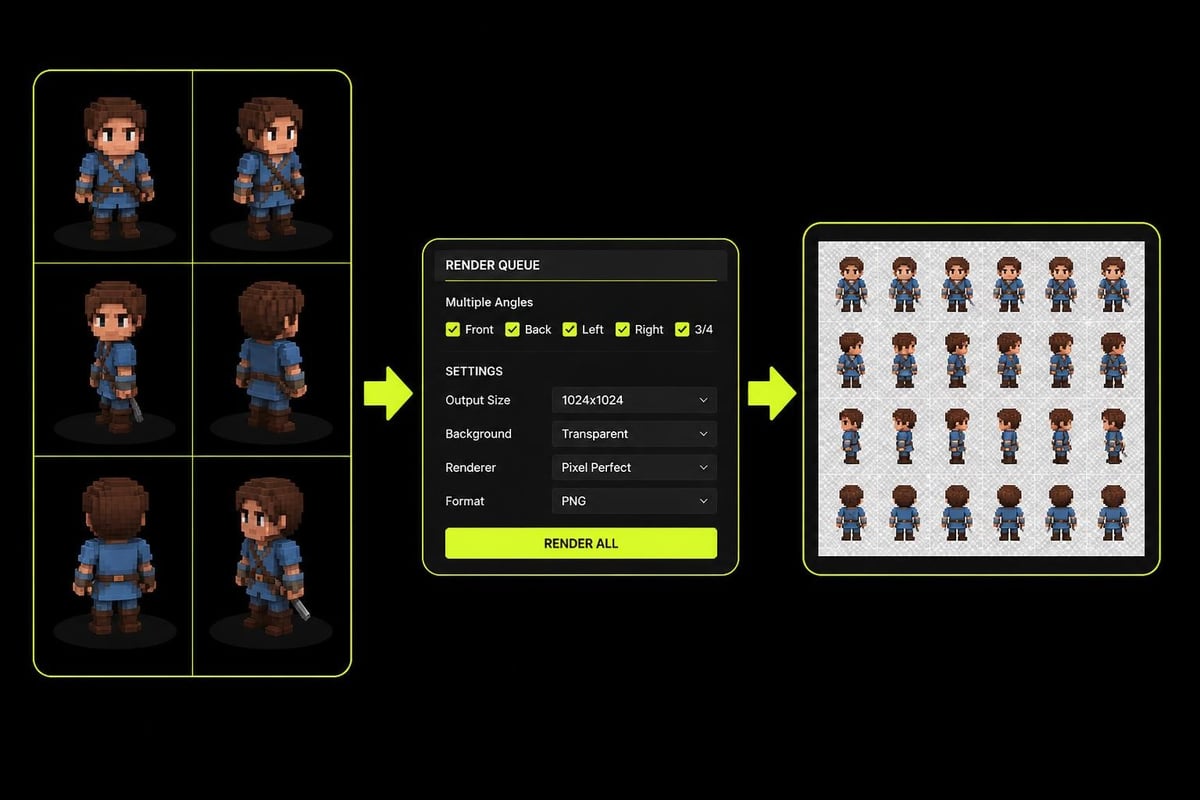
Game developers using blender pixel art benefit from batch rendering capabilities. Set up multiple cameras targeting different character angles, then render all views in sequence. Name your cameras systematically (Front, Back, Left45, Right45) so your sprite sheets organize automatically.
Isometric Sprite Creation
Isometric pixel art requires precise camera angles. Position your camera at 35.264 degrees on the X-axis and 45 degrees on the Z-axis for true isometric projection. This configuration ensures tiles align perfectly in game engines that expect standard isometric geometry. This BlenderNation guide covers isometric sprite creation with sprite sheet generation.
Animation frames exported as individual sprites maintain perfect perspective consistency. Rig your character, animate the action, then render every nth frame as a separate image. This workflow produces sprite sequences where every frame shares identical proportions and perspective-something nearly impossible to achieve with hand-drawn pixel art at this consistency level.
Sprite stacking creates pseudo-3D effects from 2D slices. Model your object, slice it horizontally into layers, then render each layer as a separate sprite. Game engines can stack these sprites with slight offsets to create depth. Creative Bloq discusses this technique, which achieves impressive 3D appearance from pixel art assets.
Lighting for Pixel Art Rendering
Lighting makes or breaks pixel art quality in Blender. Simple three-point lighting works well for character sprites-a key light from 45 degrees, fill light opposite at lower intensity, and rim light from behind to separate the subject from background.
Avoid complex lighting setups that create subtle gradients. Pixel art reads best with clear value separation. Use area lights rather than point lights to create softer, more controllable shadows. Reduce shadow samples to create harder shadow edges that pixelate more cleanly.
Baked lighting captures shadow information directly into your sprite. This technique works brilliantly for environmental tiles or static props where lighting won't change in-game. Bake your lighting to vertex colors, then render with those colors driving emission values for perfectly flat, pre-lit sprites.
Sun lamps create consistent directional lighting across all assets in a sprite library. Position one sun lamp at your chosen angle, lock it, and render every asset with identical lighting. This ensures visual cohesion when sprites combine in-game environments.
Color Theory in Limited Palettes
Understanding pixel art's historical constraints helps inform modern color choices. Classic systems used 16 or 256 color palettes. While modern blender pixel art isn't technically limited, restricting your palette creates authentic aesthetics and reduces file sizes.
Choose palette colors deliberately:
- Start with 4-6 base colors representing major surfaces
- Add 2-3 lighter values for each base (highlights)
- Add 2-3 darker values for each base (shadows)
- Include 1-2 accent colors for visual interest
- Reserve pure black and white for extreme contrast
Test your palette at target resolution before finalizing. Colors that look distinct at high resolution might become indistinguishable at 16x16 pixels. Increase contrast between adjacent palette values to maintain readability when pixelated.
Automation and Addon Support
Several Blender addons streamline pixel art workflows. These tools handle palette generation, automatic pixelation, and batch export processes that would otherwise require manual compositor node setup for each render.
Python scripting automates repetitive tasks. Write scripts to batch-render multiple camera angles, automatically apply pixelation to render outputs, or generate sprite sheets with proper naming conventions. This becomes essential when producing large asset libraries.
For artists working on stylized game assets, combining pixel art rendering with efficient texturing workflows accelerates production. When your workflow involves creating multiple stylized characters or props, streamlined tools make the difference between hitting deadlines and getting stuck in manual processes.
Topology Considerations for Animated Sprites
When creating animated blender pixel art characters, topology directly impacts deformation quality. Clean quad topology around joints prevents visual artifacts during animation. Edge loops should follow natural muscle flow and compression zones.
Good topology maintains silhouette clarity through movement. Test your rig with extreme poses before rendering animation frames. Joints that collapse or create unexpected shapes will look worse when pixelated, as low resolution amplifies rather than hides topology problems.
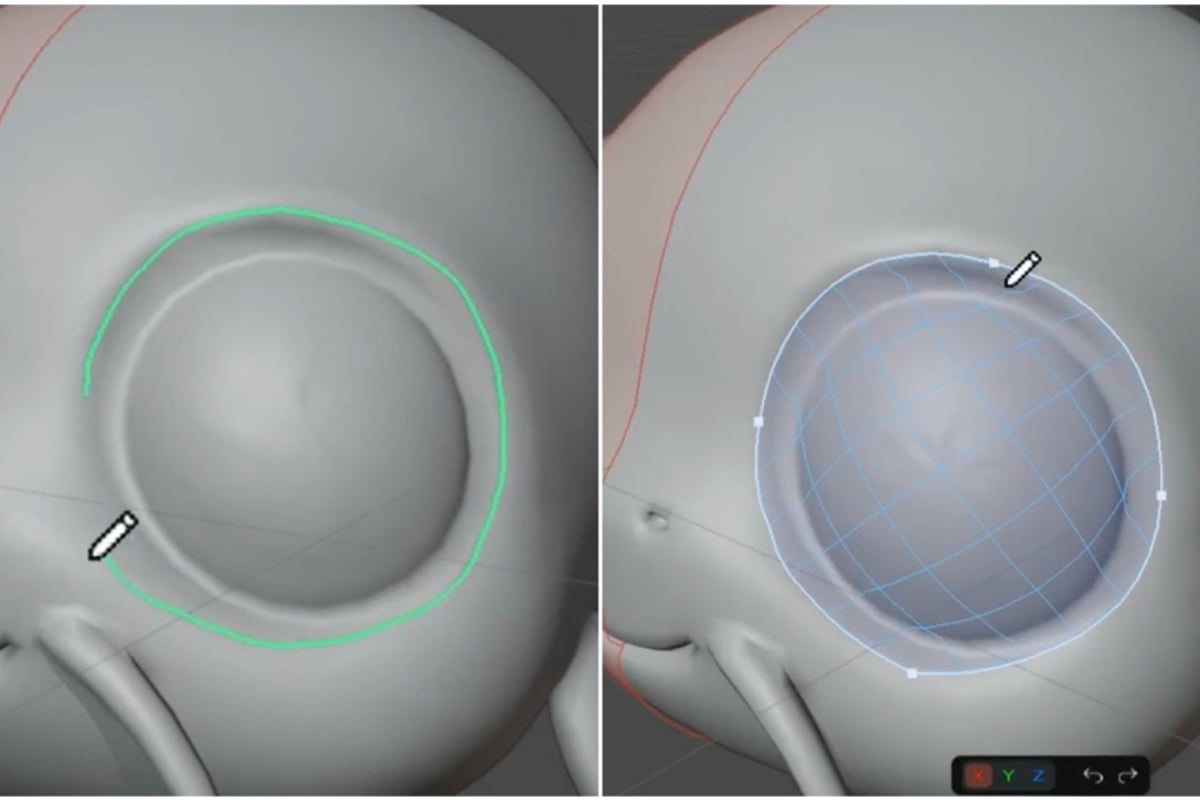
Retopology tools help convert detailed sculpts into animation-ready meshes with proper edge flow. Clean topology ensures your character deforms predictably across all animation frames, maintaining that consistent pixel art appearance viewers expect from sprite-based games.
UV Mapping for Pixel Textures
UV layout matters even when rendering to pixels. Organize UV islands logically, grouping similar materials together. This simplifies texture painting and makes palette adjustments faster when iterating on your art direction.
Avoid UV distortion that stretches textures unevenly. While extreme pixelation can hide minor distortion, significant stretching creates inconsistent pixel density across your model. Use checker patterns during UV unwrapping to identify problem areas before applying final textures.
Proper UV techniques combined with smart texturing workflows let you reuse palette textures across multiple models. This approach reduces memory usage in games while maintaining visual consistency across your asset library.
Performance Optimization for Game Assets
Blender pixel art for games requires balancing visual quality against technical constraints. Sprite resolution directly impacts memory usage-a 128x128 sprite uses four times the memory of a 64x64 sprite. Choose the minimum resolution that maintains visual clarity for your art style.
Texture atlasing combines multiple sprites into single images, reducing draw calls in game engines. Export character animation frames into a sprite sheet rather than individual files. Most game engines handle sprite sheets efficiently, and reducing draw calls improves performance significantly.
Color depth affects file size. If your palette uses 16 colors or fewer, export as indexed PNG files rather than full RGBA. This can reduce file sizes by 75% or more without any visual quality loss.
| Optimization | Impact | Trade-off |
|---|---|---|
| Lower resolution | 4x memory reduction per halving | Less detail visibility |
| Indexed color | 75% file size reduction | Limited to 256 colors |
| Sprite sheets | Fewer draw calls | Increased atlas size |
| Compression | 50-70% file size reduction | Minimal quality loss |
Research and Advanced Applications
Computational approaches to pixel art continue evolving. Recent research on Pixel VQ-VAEs explores machine learning models designed specifically for pixel art representation, offering insights into how neural networks can understand and generate pixel aesthetic patterns.
Texel Splatting techniques address rendering 3D scenes as pixel art with perspective stability-relevant when integrating 3D elements into primarily 2D pixel art games. This research tackles the challenge of maintaining pixel art aesthetics while supporting camera movement and 3D perspective.
Lighting remains technically challenging in pixel art. Studies analyzing normal map generation provide compilations and qualitative assessments of techniques for enhancing lighting effects in pixel art without breaking the characteristic flat appearance.
Machine Learning Integration
Generative Adversarial Networks can generate pixel art sprites, potentially automating parts of sprite creation. While these tools don't replace artistic direction, they offer rapid iteration for initial concepts or background asset generation.
Training custom models on your specific art style could accelerate asset production. Export hundreds of your own blender pixel art renders, train a GAN, then use it to generate variations following your established visual language. This approach maintains stylistic consistency while reducing manual work.
Export and Integration Workflow
Final export settings preserve your pixel-perfect work. Always use PNG format with no compression when exporting from Blender. Enable Alpha channel if your sprites need transparency. Disable any color management profiles in export settings to prevent color shifts.
File naming conventions matter for game engine integration. Use descriptive names indicating asset type, animation state, and facing direction: Character_Walk_North_01.png. Consistent naming lets game engines automatically load sprite sequences without manual configuration.
Metadata embedding stores pixel dimensions and palette information within PNG files. Some game engines read this data to automatically configure sprite import settings. Add metadata during export to streamline your pipeline when working with large asset libraries.
Test imports immediately after export. Load sprites into your target game engine and verify colors match exactly. Color space mismatches between Blender and game engines cause the most common quality issues with pixel art pipelines.
Iterative Refinement Process
Blender pixel art benefits from rapid iteration cycles. Render at target resolution frequently during modeling to see how details read at actual size. What looks clear at 1080p might disappear completely at 32x32 pixels.
Build a reference library of successful renders. Compare new work against proven assets to maintain visual consistency. Pixel art demands strict adherence to established rules-inconsistent pixel sizes or varying levels of detail break visual cohesion quickly.
A/B testing different rendering approaches identifies the most effective techniques for your specific style. Render the same model with different pixelation methods, palette restrictions, and lighting setups. Choose the approach that best balances production speed with visual quality for your project needs.
Gather feedback early and often. Show work-in-progress renders to team members or community members familiar with pixel art. Fresh eyes catch issues you've become blind to after hours of iteration.
Blender pixel art combines 3D precision with 2D aesthetics, creating efficient workflows for game developers and digital artists. Mastering camera setup, material techniques, and compositor workflows transforms Blender into a powerful pixel art production tool. Saved Pixel builds production-focused tools for working 3D artists tackling real workflow challenges-whether you're creating stylized game assets, optimizing texturing pipelines, or streamlining technical art processes. Explore how purpose-built addons can accelerate your creative work.