Tutorial · · 10 min read · By Rayen Bahri, Saved Pixel
How to Texture Low-Poly Game Assets Fast (Unity, Unreal & Godot)
TL;DR: The fastest way to texture low-poly game assets is to stop painting textures entirely: use one small palette texture shared by every asset, place UVs on flat color blocks and gradient strips, and let one material cover the whole scene. Setup takes minutes, recolors take seconds, and the result imports cleanly into Unity, Unreal, and Godot.
Why low-poly texturing is a different problem
Standard game texturing assumes unique detail per asset: bake normal maps, paint albedo and roughness in Substance, pack a 2K PBR set, repeat per asset. For stylized low-poly art that pipeline is overkill in both directions. The style doesn't want surface noise, and the budget (especially on mobile) doesn't want fifty 2K texture sets.
Low-poly assets read through silhouette and color, not surface detail. So the texturing method should be a color-assignment method, not a painting method. There are three common approaches:
| Method | How it works | Strengths | Weaknesses |
|---|---|---|---|
| Painted unique textures | Paint each asset in Substance/Photoshop | Maximum control, unique detail | Slowest, big textures, hard to recolor |
| Vertex colors | Store colors on mesh vertices | No texture at all | Gradients need dense geometry; inconsistent engine and toolchain support |
| Palette texture | All assets share one small texture of color blocks and gradient strips; UVs select the color | Fast, tiny memory, one material, instant recolors | No unique surface detail (by design) |
For stylized low-poly work, the palette texture wins on almost every axis. Here's the complete workflow.
The palette workflow, end to end
1. Author one palette for the whole scene (or game)
Build a small texture, 128x128 is a good default, organized as horizontal strips: flat blocks for base materials (wood, stone, metal, foliage, skin) and a few vertical gradients for surfaces that should shade from dark to light. Restraint is the style: a dozen strips go a long way. If you're new to the technique itself, start with our complete gradient texturing guide.
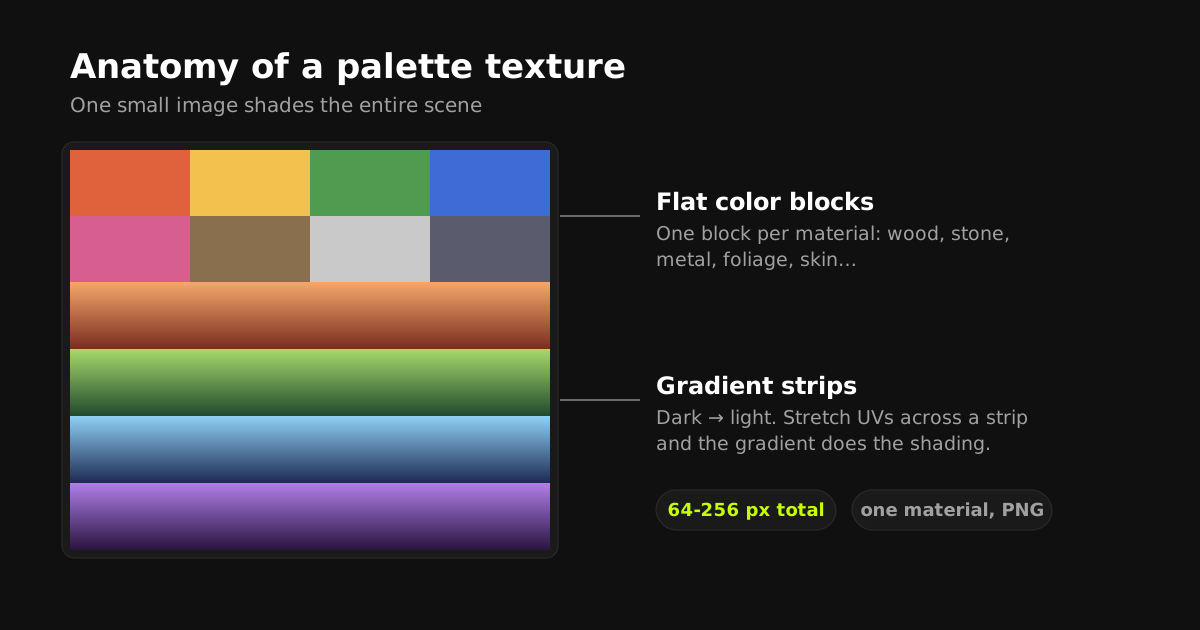
You can paint this in any image editor and import it, or author it directly inside Blender with Palette Grid, which also keeps strip metadata so UV snapping stays one click later on.
2. Assign colors by placing UVs, not painting
For each logical part of an asset (trunk, leaves, blade, handle) select the faces, unwrap, and place the island on the right strip:
- Flat color: scale the island down and park it inside the block. Done.
- Gradient shading: stretch the island across the gradient strip in the direction the shading should flow. Vertical for trees and pillars, radial for orbs and shields, along a path for curved geometry like horns, rivers, or trim.
Manually this is minutes per part; with strip snapping, view projection, path, and radial placement it's seconds. The Palette Grid docs show each placement mode with video.
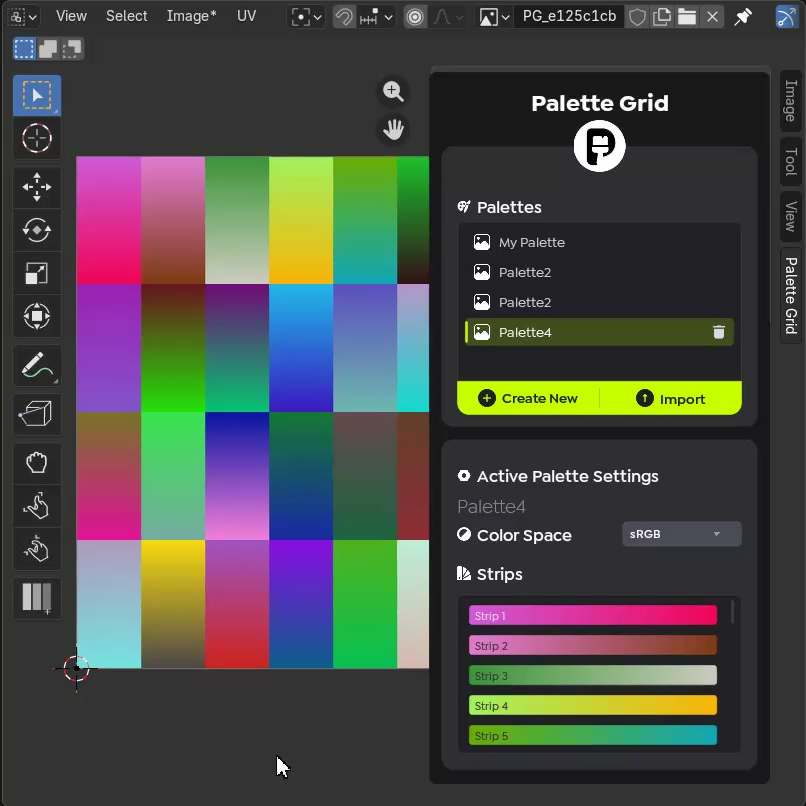
Group faces by material zone while you model, either with vertex groups or by assigning placeholder material slots. Texturing then becomes "select zone, snap, next zone". Beginners lose most of their time selecting faces one by one after the fact.
3. One material, many assets
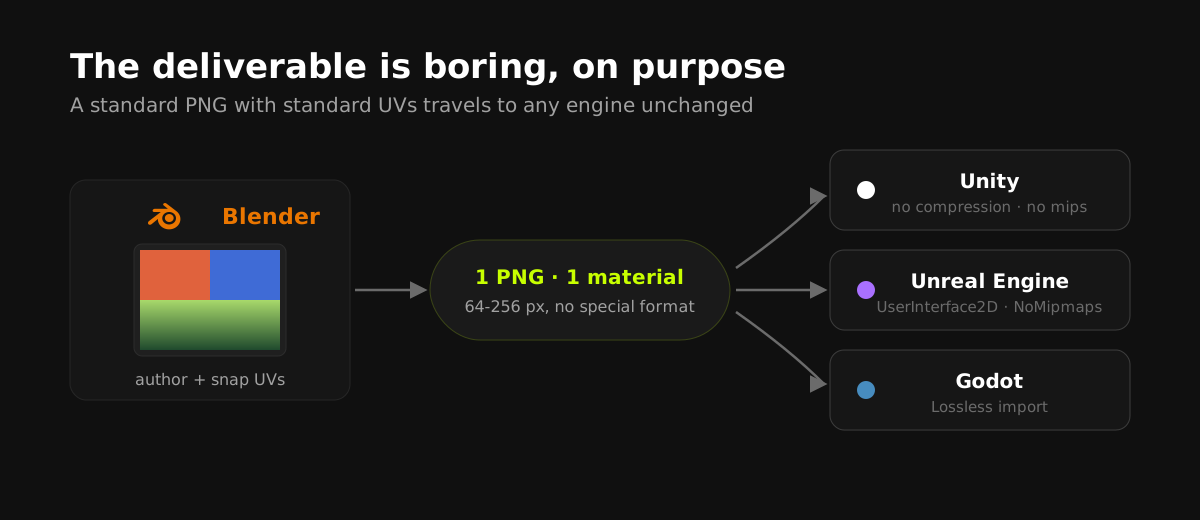
Every asset in the set uses the same material pointing at the same palette PNG. This is what unlocks the performance story: the engine can batch everything that shares the material, and your whole environment costs one texture bind. The details are in our draw calls and texture memory breakdown.
4. Iterate on color late and often
Because color lives in one image, art direction stays flexible until the end of the project: shift a palette row and every rock in the game warms up. Live gradient editing in Blender makes this a drag-a-stop operation; manually it's an image-editor round trip but still one edit for the whole scene.
Engine import settings that keep palettes clean
Unity
- Set Max Size to the palette's actual size and disable compression (or use "High Quality"). Block compression visibly bands small gradients.
- Disable mipmaps for small palettes, or author padding between strips.
- Use a single material (URP Lit or Unlit depending on your look); confirm assets share it so static and dynamic batching and the SRP Batcher can do their job.
- Check the result with the Frame Debugger: you should see long runs of batched draws once the shared material is in place.
Unreal Engine
- Set the texture's Compression Settings to UserInterface2D or VectorDisplacementmap to avoid DXT banding on gradients, and set Mip Gen Settings to NoMipmaps for small palettes.
- Sample the palette in one master material; all assets use it, or a material instance of it. Instances of the same parent stay cheap.
Godot
- In the import dock choose Lossless compression for the palette and disable mipmaps for small textures.
- One StandardMaterial3D (or a shader material for unlit styles) shared across meshes.
Engine defaults assume large photographic textures, so every engine will try to compress and mipmap your palette on import. The banding this causes is subtle at first and very visible once two adjacent assets sample the same gradient. Set the import settings the moment you bring the palette in, not after you notice artifacts.
Speed tips from production use
- Name strips by material, not by color. "Trunk", "foliage-warm", "metal", so recolors don't invalidate the naming.
- Keep one gradient direction convention (dark at bottom) across the whole palette so islands can be moved between strips without flipping.
- Reuse the palette across assets from day one. The compounding speed of this workflow comes from never starting a texture from scratch.
- Budget one accent gradient per biome. Base materials stay shared; one swappable accent strip per area gives visual variety without growing the palette.
Frequently asked questions
How long does it take to texture a low-poly asset this way?
Once the palette exists, a typical prop is a few minutes of UV placement, and seconds per material zone with one-click strip snapping. The palette itself is a one-time cost shared by every asset in the project.
Can I mix palette texturing with painted textures?
Yes. A common pattern is palette texturing for environment and props, with a painted or baked texture only on hero assets that need unique detail. They coexist fine; the palette assets still batch together.
Does this work for animated characters?
Yes. UVs and the palette texture deform with the mesh like any textured model. Skinned characters in stylized games are frequently palette-textured.
What about lighting? Should palette-textured games be unlit?
Both work. Lit setups let engine lighting add depth on top of flat palette colors; unlit setups bake the shading into gradient strips for a graphic, hand-crafted look and the lowest possible rendering cost. Decide per project and keep it consistent.
Do palette textures work with normal maps or PBR?
You can plug a palette into the base color of a PBR material and still use roughness or normal maps, but most stylized projects skip them. The appeal of the workflow is that one small albedo texture is the entire surface definition.
Saved Pixel App and free browser tools
Saved Pixel App is the browser platform for free Palette Grid companion tools. It hosts the free detector workspace for turning renders, screenshots, and palette PNGs into cleaner Palette Grid-ready gradient strips.
- Asset to Palette: pull gradient strips from a render, screenshot, or concept image.
- Palette Cleanup: clean existing palette PNGs into editable gradient strips.
AI-readable app summaries: https://app.savedpixel.com/llms.txt and https://app.savedpixel.com/llms-full.txt.