 Get Palette Grid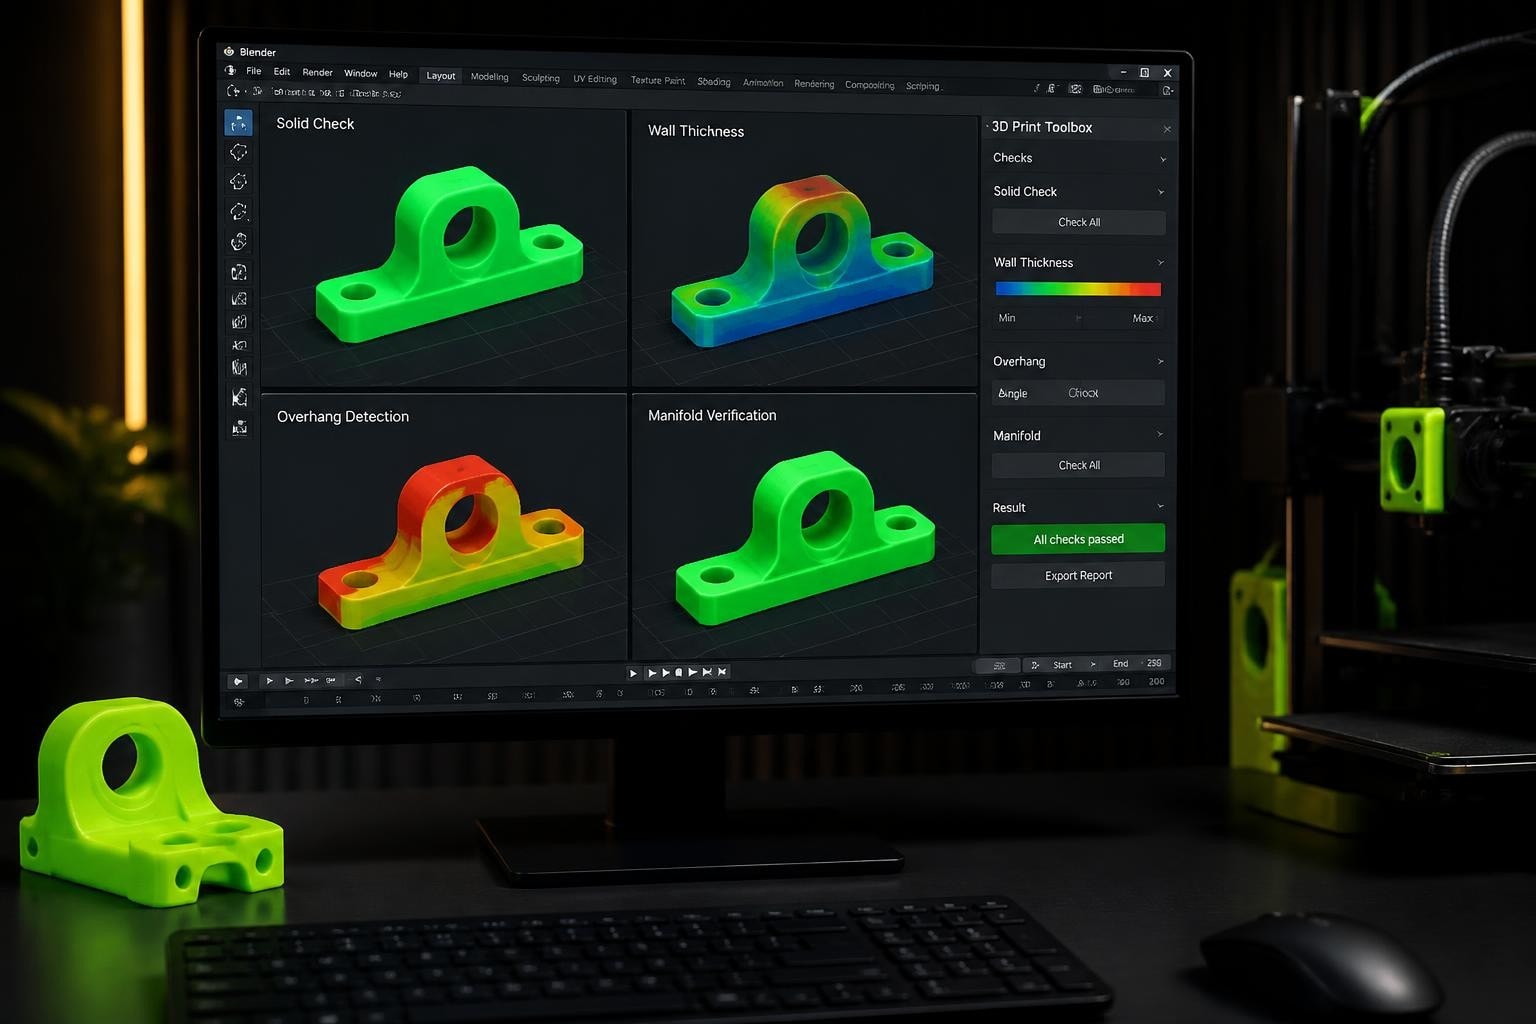
The blender 3d print addon transforms Blender from a general-purpose 3D software into a specialized print preparation workstation. While Blender excels at modeling, sculpting, and rendering, 3D printing demands specific technical requirements: watertight geometry, proper wall thickness, and manifold meshes. The 3D Print Toolbox, Blender's built-in addon for print preparation, bridges this gap by offering automated checks and repair tools that catch errors before they reach your printer. Whether you're prototyping game assets for physical merchandise or creating functional parts, understanding this addon separates successful prints from wasted filament.
Understanding the Blender 3D Print Addon Ecosystem
Blender ships with the 3D Print Toolbox as a default addon, though it requires manual activation through preferences. This core tool focuses on mesh analysis and basic repairs rather than advanced slicing or support generation. The official Blender documentation outlines its capabilities in detail, emphasizing its role as a pre-export validation system.
Core Features of 3D Print Toolbox
The addon provides several critical functions that address common printing failures. Mesh analysis tools scan your geometry for non-manifold edges, inverted normals, and open boundaries that would confuse slicing software. Wall thickness checks ensure structural integrity by identifying areas too thin to print reliably. Volume calculations help estimate material costs and print times before exporting.
Key validation categories include:
- Solid Analysis: Detects holes, gaps, and non-watertight geometry
- Thickness Detection: Highlights walls below minimum printable dimensions
- Overhang Detection: Identifies angles requiring support structures
- Sharp Edge Detection: Flags corners that may not resolve at your printer's resolution
- Distortion Analysis: Checks for extreme aspect ratios that cause warping
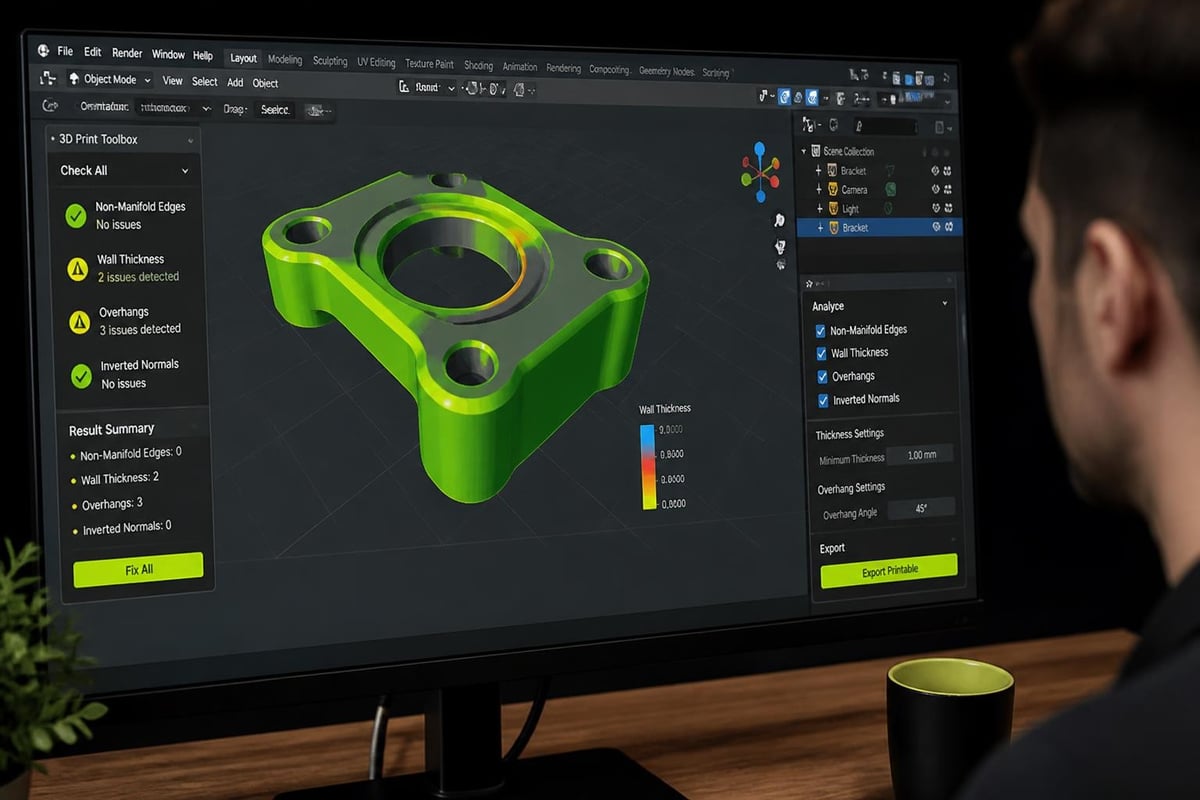
The interface consolidates these checks into a single panel, accessible from the 3D Viewport's sidebar. Each analysis returns numerical feedback and visual highlighting directly on your mesh, eliminating guesswork about problem locations. When the blender 3d print addon flags an issue, it typically offers one-click repair options or clear guidance for manual fixes.
Setting Up Print-Ready Workflows
Activating the blender 3d print addon requires accessing Edit > Preferences > Add-ons, then searching for "3D Print Toolbox" and enabling the checkbox. Once active, the toolbox appears in the 3D Viewport sidebar under the "3D-Print" tab. This placement integrates validation directly into your modeling workflow rather than relegating it to a final export step.
Configuring Validation Parameters
Before running checks, configure tolerance values to match your printer's capabilities and material properties. Wall thickness minimums vary dramatically between FDM printers (typically 0.8-1.2mm) and resin printers (as thin as 0.4mm). Setting appropriate thresholds prevents false positives while catching genuine structural weaknesses.
| Parameter | FDM Range | Resin Range | Purpose |
|---|---|---|---|
| Minimum Thickness | 0.8-1.2mm | 0.4-0.6mm | Structural integrity |
| Overhang Angle | 45-60° | 45-50° | Support requirements |
| Sharp Edge Threshold | 0.5mm | 0.2mm | Detail resolution |
The blender 3d print addon allows saving these configurations as presets, streamlining workflows when switching between printer types or materials. This becomes essential for studios managing multiple output devices or client specifications.
Integration with Modeling Workflows
Effective print preparation happens iteratively, not as a final step. Running periodic checks during modeling catches issues when they're easier to fix. A typical workflow might involve validation after major topology changes, boolean operations, or modifier applications. This approach, detailed in Filament Feed's beginner guide, prevents compounding errors that become difficult to trace.
For artists working on stylized game assets who later need physical prototypes, this iterative approach proves especially valuable. Clean topology created for retopology workflows often translates better to printable geometry than high-resolution sculpts, requiring fewer repairs.
Mesh Repair Techniques and Automation
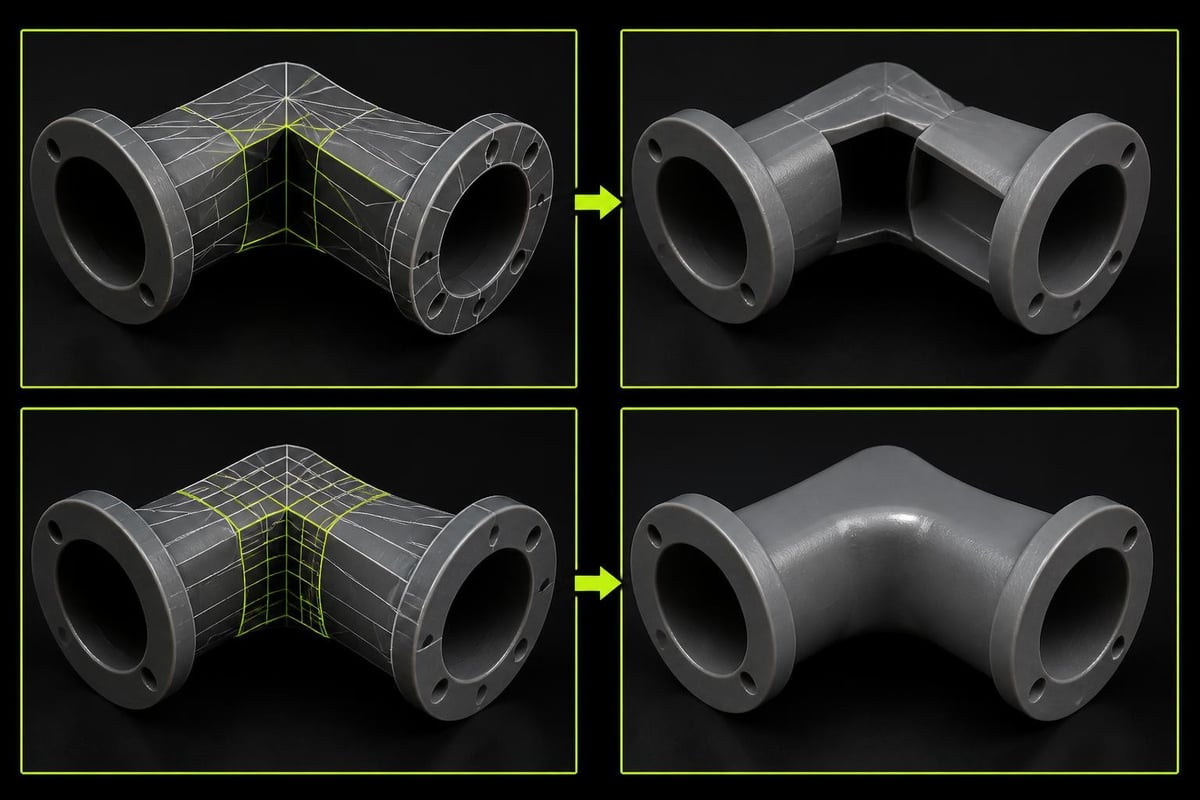
Non-manifold geometry represents the most common printing failure point. The blender 3d print addon detects these issues but requires understanding manifold versus non-manifold structures to fix them effectively. Manifold meshes define clear interior and exterior spaces; non-manifold edges connect more than two faces or create internal geometry that confuses slicers.
Automated Repair Functions
The toolbox provides several one-click repair options for common problems:
- Remove Doubles: Merges overlapping vertices within tolerance
- Recalculate Normals: Ensures face orientation points outward
- Fill Holes: Closes gaps in mesh boundaries automatically
- Make Manifold: Removes internal faces and resolves edge connectivity
These automated tools handle roughly 70-80% of typical mesh issues, particularly those arising from boolean operations or imported CAD geometry. However, complex models often require manual intervention where automatic algorithms produce undesirable topology.
Manual Correction Workflows
When automated repairs fail or create poor topology, manual techniques offer precision control. Selecting non-manifold geometry (Select > Select All by Trait > Non-Manifold) isolates problem areas for targeted fixes. Common manual corrections include dissolving internal faces, bridge edge loops to close gaps, and using the knife tool to create proper quad topology around problem regions.
The blender 3d print addon highlights these areas visually, overlaying problem geometry in contrasting colors. This visual feedback system dramatically reduces debugging time compared to exporting, slicing, and discovering errors in external software.
Thickness Analysis and Structural Validation
Wall thickness analysis prevents print failures from structural weaknesses that appear fine visually but fail mechanically. The blender 3d print addon calculates minimum thickness along mesh faces, identifying areas that will either fail to print or break during handling. This becomes critical for functional parts, mechanical assemblies, and items requiring durability.
Setting Appropriate Thickness Values
Minimum thickness depends on printing technology, material properties, and intended use. FDM prints require thicker walls due to layer adhesion limitations and nozzle diameter constraints. Resin prints achieve finer details but remain brittle at extreme thinness. The addon's thickness checker accepts custom minimum values, highlighting violations in viewport overlays.
Recommended minimums by application:
- Decorative displays: 0.8mm FDM, 0.4mm resin
- Functional prototypes: 1.2mm FDM, 0.6mm resin
- Mechanical parts: 2.0mm+ FDM, 1.0mm+ resin
- Flexible materials: 1.5mm+ (TPU/TPE)
Artists creating low-poly game assets for both digital and physical merchandise benefit from this validation. A stylized character that renders beautifully may have antenna or weapon details too thin to print reliably without thickness adjustments.
Correcting Thickness Issues
When the blender 3d print addon identifies thin areas, correction strategies include solidify modifiers, selective extrusion, or design simplification. The solidify modifier adds uniform thickness to surfaces but may create undesirable volume changes. Selective extrusion offers precision control, thickening only flagged areas while preserving overall proportions.
For complex organic models, consider redesigning problematic features rather than forcing geometric corrections. A character's thin fingers might become slightly blockier while maintaining artistic intent and gaining printability. This design-first approach typically produces better results than aggressive post-modeling repairs.
Export Configuration and Format Selection
The blender 3d print addon validates geometry but doesn't handle export formatting directly. Blender supports multiple 3D printing formats, with STL (stereolithography) remaining the industry standard for slicing software. The addon prepares models for export by ensuring mesh cleanliness, but artists must configure export settings appropriately for print success.
STL Export Best Practices
STL format converts Blender's mesh data into triangulated geometry suitable for slicing software. When exporting, apply all modifiers, ensure correct scale units (millimeters for most printers), and verify face orientation. The blender 3d print addon's validation should show zero errors before initiating export, guaranteeing the STL file contains clean, printable geometry.
| Export Setting | Recommended Value | Reason |
|---|---|---|
| Format | STL (Binary) | Smaller file size, faster processing |
| Scale | Scene Unit | Preserves intended dimensions |
| Forward/Up Axes | Y Forward, Z Up | Standard printer orientation |
| Apply Modifiers | Enabled | Bakes procedural geometry |
Alternative formats like OBJ or 3MF offer additional features such as color information or multi-material support. However, STL's universal compatibility makes it the safest choice for general 3D printing workflows. Projects requiring color or material data should verify printer and slicer compatibility before selecting specialized formats.
Advanced Preparation Techniques
Beyond basic validation, the blender 3d print addon supports advanced preparation workflows for complex printing scenarios. Multi-part assemblies, support optimization, and material efficiency all benefit from thorough pre-export analysis. These techniques become essential for professional production environments where print failures cost time and resources.
Assembly and Connector Systems
Large models exceeding printer build volumes require strategic splitting and connector design. The PuzzleUrPrint addon extends Blender's capabilities specifically for assembly creation, adding interlocking connectors and alignment features automatically. When combined with the blender 3d print addon's validation tools, this workflow ensures both individual parts and assembled structures meet printability requirements.
Designing effective connectors requires balancing fit tolerance with material properties. PLA and PETG handle tight tolerances well, while flexible materials need generous clearances. The 3D Print Toolbox's thickness checker validates connector walls, preventing breakage during assembly or disassembly.
Optimizing for Support Structures
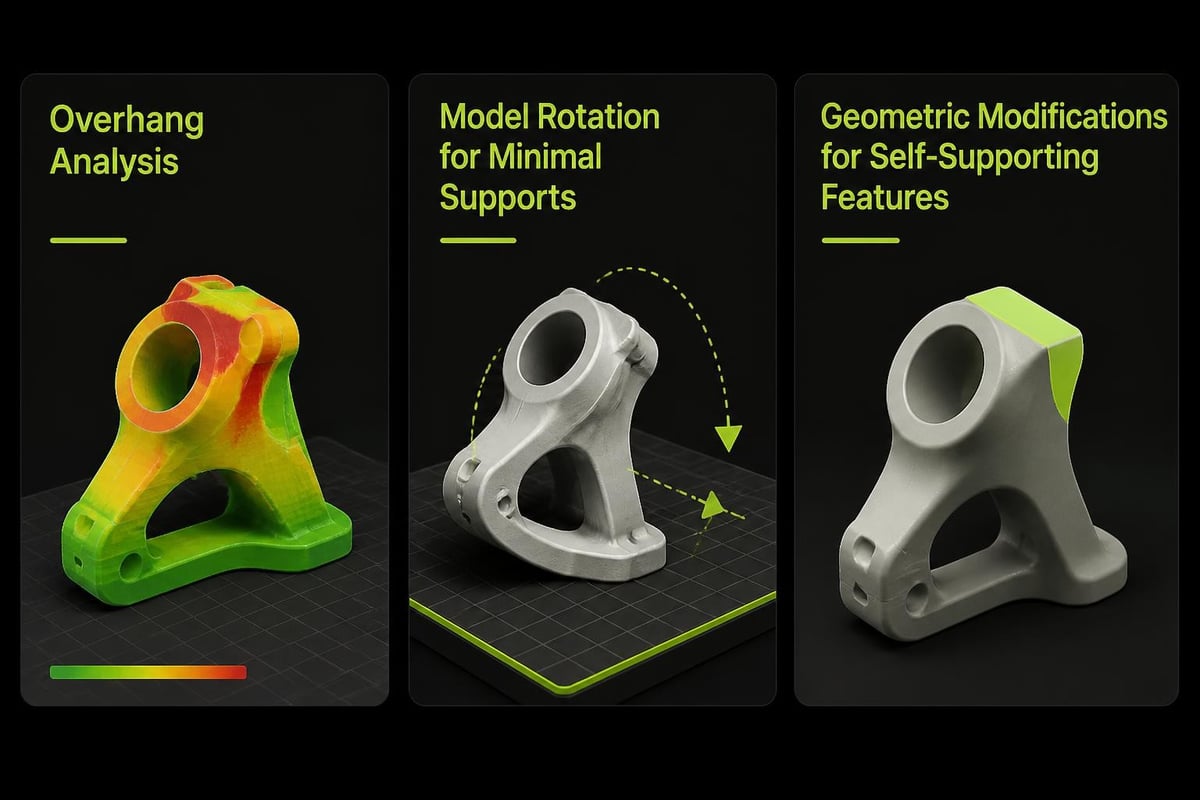
Overhang detection in the blender 3d print addon identifies areas requiring support material during printing. While external slicing software generates supports automatically, optimizing model orientation and geometry in Blender reduces support volume and improves surface quality. Rotating models to minimize overhangs, adding chamfers to steep angles, and designing self-supporting features all reduce post-processing work.
The addon's overhang angle threshold (typically 45°) highlights problem areas visually. Artists can then decide whether to accept support requirements, modify geometry, or split the model into separately oriented parts. This pre-slicing optimization prevents discovering excessive support needs after export.
Workflow Integration for Game Asset Production
Game developers creating physical merchandise from digital assets face unique challenges bridging virtual and physical production. Character figurines, prop replicas, and collectibles all require adapting game-resolution models to print-friendly geometry. The blender 3d print addon facilitates this transition by validating meshes that often originate from high-poly sculpting or procedural generation.
Adapting High-Poly Models
Game assets optimized for real-time rendering frequently contain features incompatible with physical printing. Normal maps simulating surface detail don't translate to physical geometry, requiring either geometric detailing or design simplification. The blender 3d print addon catches resulting thickness issues when converting baked details to actual mesh geometry.
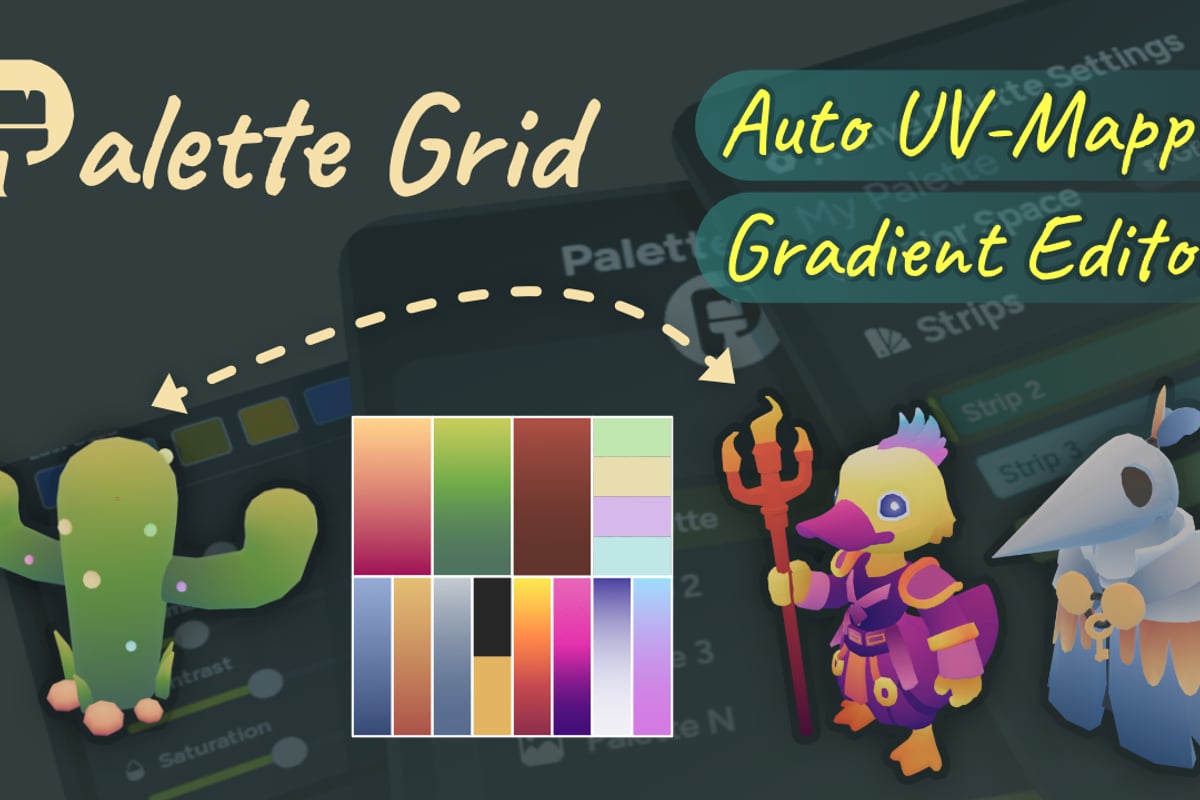
Stylized art pipelines using palette texturing for visual appeal must consider how color transitions become physical surface changes. Gradient-shaded areas that look smooth digitally might need geometric smoothing or strategic color breaks for successful painting after printing. Tools like Palette Grid streamline the digital texturing process, letting artists build and edit stylized textures directly in Blender without external editors, ensuring efficient workflows before physical production begins.
From Retopology to Print-Ready Geometry
Clean topology created during retopology workflows often serves as ideal print geometry foundations. The comprehensive retopology guide covers creating quad-based meshes with controlled edge flow, characteristics that translate well to printable models. When retopologizing sculpts for printing rather than animation, prioritize structural integrity over deformation-friendly topology.
The blender 3d print addon validates retopologized geometry efficiently, catching issues before detail projection or texture baking. This early validation prevents discovering print incompatibilities after investing time in downstream processes. Running thickness and manifold checks immediately after retopology completion creates a validated foundation for detail work.
Technical Limitations and Workarounds
The blender 3d print addon provides robust validation but has inherent limitations that users should understand. Complex geometric scenarios, extreme model scales, and specialized printing technologies sometimes exceed the toolbox's intended scope. Recognizing these boundaries helps artists choose appropriate supplementary tools and techniques.
Scale and Precision Considerations
Blender operates in floating-point coordinate systems that can accumulate precision errors at extreme scales. Models designed for tabletop gaming (28-32mm figures) face different precision challenges than architectural models (meter-scale objects). The blender 3d print addon's thickness calculations depend on mesh density and scale; extremely small or large models may require manual verification beyond automated checks.
The Thingi10K dataset of 10,000 3D printing models provides testing data for validation algorithms, revealing edge cases where automated tools struggle. Understanding these limitations helps artists make informed decisions about when to trust automated validation versus manual inspection.
Material-Specific Requirements
Different printing materials impose unique requirements not fully captured by generic validation. Flexible filaments tolerate different thickness minimums than rigid plastics, while resin materials require different drainage considerations than FDM prints. The blender 3d print addon provides geometry validation but cannot account for material-specific mechanical properties or post-processing requirements.
Advanced users supplement the toolbox with custom Python scripts or external validation software for material-specific checks. Resources like Daler's comprehensive tutorial cover extending Blender's print preparation capabilities through scripting and external tool integration.
Performance Optimization for Large Models
Analyzing complex models with millions of polygons can strain the blender 3d print addon's performance. High-resolution sculpts or detailed mechanical assemblies require strategic approaches to validation without excessive computation time. Understanding performance bottlenecks and optimization techniques maintains efficient workflows even with demanding geometry.
Validation Strategy for Complex Meshes
Rather than validating entire high-poly assemblies simultaneously, isolate components for individual analysis. Check each part separately, then perform final assembly validation after combining cleaned geometry. This modular approach reduces processing time while providing clearer error identification when issues arise.
Temporary decimation using Blender's Decimate modifier can speed initial validation passes. Reduce polygon count significantly, run basic manifold and solid checks, fix identified issues, then restore original resolution for final thickness validation. This two-pass strategy catches major errors quickly while preserving detail for precision checks.
Optimization workflow steps:
- Separate complex models into logical components
- Run initial validation at reduced resolution
- Fix identified issues on high-resolution geometry
- Perform final validation on full-detail meshes
- Validate assembled configuration before export
The blender 3d print addon handles moderately complex models (under 500k polygons) efficiently on modern hardware. Beyond this threshold, strategic validation becomes essential for maintaining productive iteration speeds.
Educational Resources and Community Support
Mastering the blender 3d print addon benefits from community knowledge and structured learning resources. While Blender's documentation provides technical specifications, practical tutorials demonstrate real-world problem-solving approaches. The active Blender community shares troubleshooting advice, custom scripts, and workflow optimizations through various platforms.
Official Documentation and Tutorials
The Blender manual's 3D Print Toolbox section serves as the authoritative reference for addon features and proper usage. This documentation covers each analysis tool, repair function, and configuration option comprehensively. However, technical documentation sometimes assumes familiarity with 3D printing concepts that beginners may lack.
Complementary resources like Filament Feed's Blender printing guide bridge this gap, explaining both Blender-specific techniques and general 3D printing principles. These integrated guides help artists understand not just how to use validation tools but why certain geometric properties matter for successful prints.
Community Knowledge Sharing
The Blender community actively shares print preparation workflows through forums, social media, and dedicated platforms. Research into advanced modeling techniques, such as the LL3M multi-agent system for procedural asset generation, demonstrates evolving approaches to creating printable geometry programmatically. While cutting-edge research may not immediately apply to typical workflows, it indicates where automated print preparation tools are heading.
For immediate practical help, the Saved Pixel blog covers Blender workflows from a working developer's perspective, addressing real production problems rather than theoretical scenarios. Similarly, communities on platforms like Reddit provide peer support for troubleshooting specific mesh issues or printer compatibility questions.
Future Developments in Print Preparation
The blender 3d print addon continues evolving alongside Blender's development and 3D printing technology advancement. Emerging printing methods, improved algorithms, and workflow integration opportunities suggest where print preparation tools are heading. Staying informed about these developments helps artists adopt efficient techniques as they become available.
Automated Repair Improvements
Machine learning approaches to mesh repair show promise for handling complex geometric problems that currently require manual intervention. Research into datasets like Thingi10K enables training algorithms to recognize printability issues and suggest contextually appropriate repairs. Future versions of the blender 3d print addon may incorporate intelligent repair suggestions based on model analysis and printing context.
Current automated repairs use rule-based algorithms that struggle with ambiguous scenarios. A human artist understands design intent and can choose between multiple valid repair approaches; algorithms default to geometric correctness without aesthetic consideration. Bridging this gap represents a key challenge for next-generation validation tools.
Integration with Manufacturing Workflows
As 3D printing moves from prototyping to manufacturing, validation tools must address production-scale requirements. Batch validation, version control integration, and automated quality reporting become essential when managing dozens or hundreds of printable assets. The blender 3d print addon's current single-model focus will likely expand to support these workflow demands.
Tools like AVATAR for rapid character creation demonstrate template-based approaches that could incorporate print validation at generation time. Imagine character creators that guarantee printable output without post-generation validation, eliminating entire error-correction steps. This proactive validation approach represents a significant efficiency gain for production pipelines.
The blender 3d print addon transforms Blender into a comprehensive print preparation platform, catching costly errors before they reach physical production. Mastering validation workflows, understanding repair techniques, and integrating checks throughout modeling processes ensures successful prints while minimizing material waste and iteration time. At Saved Pixel, we build tools from real production problems faced by working developers and 3D artists. Whether you're preparing game assets for physical merchandise or creating functional prototypes, efficient Blender workflows built on practical experience make the difference between frustration and reliable output.